Search This Blog

Friday, March 18, 2022

LILAC KITS!! Plus a 25% off sale on the Tutorial.

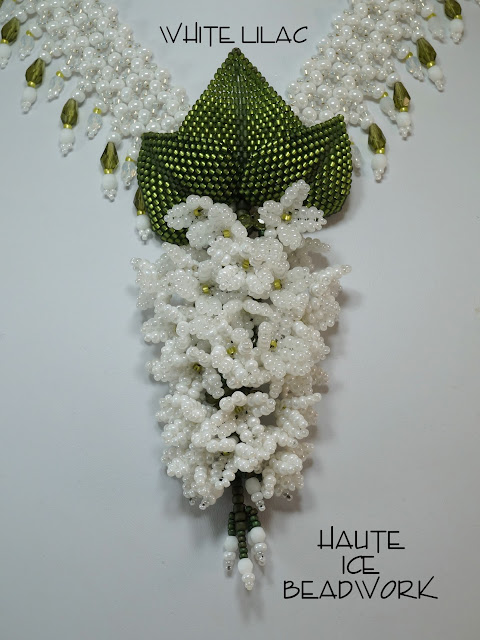
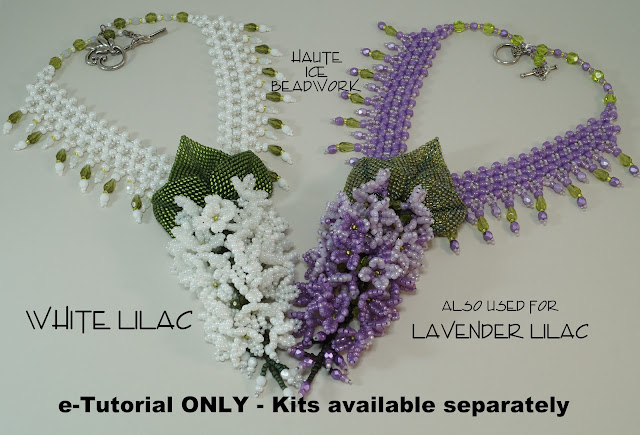
One of the first tutorials I wrote was "White Lilac".  And at the time, I thought I would make kits for the project.  As it turned out, making those kits was a substantial task.  Twenty bags (and this by  consolidated several groups of products into more eco-friendly single bags) and 27 different items were required!  At the time, I simply lacked the organizational experience to do this.  But now, older, wiser, and more experienced, I MET THAT GOAL.

I HAVE LISTED THESE KITS IN MY SHOP, AND THE TUTORIAL SALE IS LIVE AND LASTS THROUGH THE END OF THIS MONTH.    
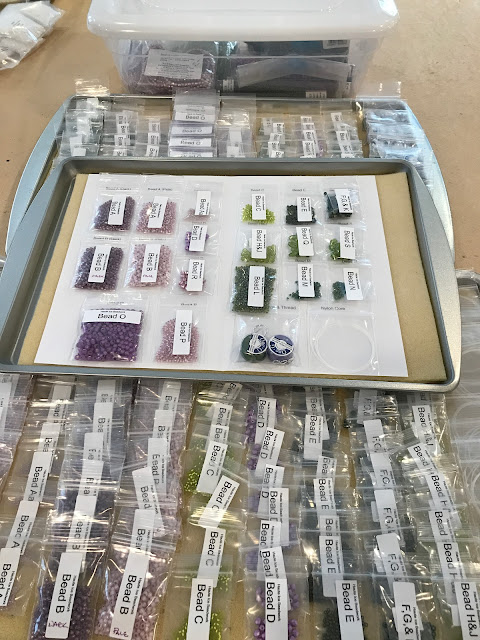

The most common feedback I get for this tutorial is about how hard it is to find all the beads.  So given that I had bought many of the beads for the white colorway in 2016, (and more since, as I have run into them at what I consider to be kitting prices) I have decided it is time to remedy that situation.  
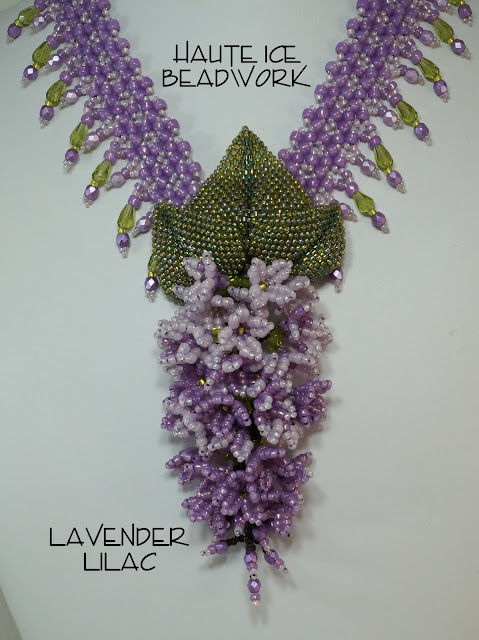

I also have a new colorway I am calling Lavender Lilac, plus the original White Lilac colorway and the kits are finally assembled, the tutorial buffed up, and a 25% off sale on the tutorial are all ready to go, just in time for the vernal equinox! 

The White Lilac is built from two different white Czech rounds and their organic shapes and subtle color shifts are so beautiful in these flowers!  They have a sharper, deeper matte green leaf, and are high contrast, with a subtly sparkly gilt-lined Ceylon pearl Toho bead in the yoke.  I wear mine with several different colors and always have people stopping me to look at the necklace. 
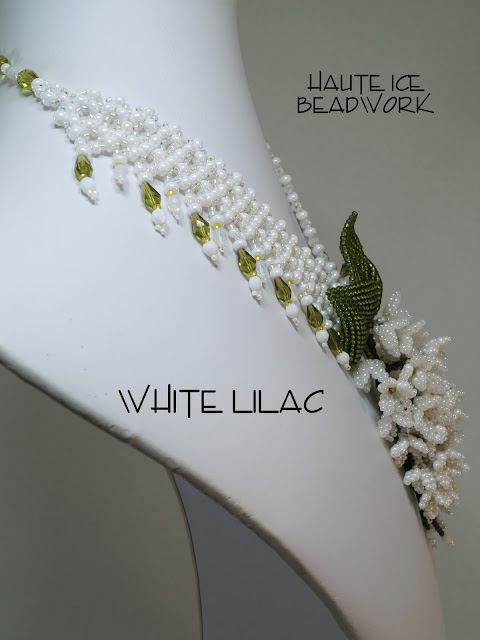

Love the way this upper leaf pulls away from the neck, and how the attachment allows for a V or a choker!
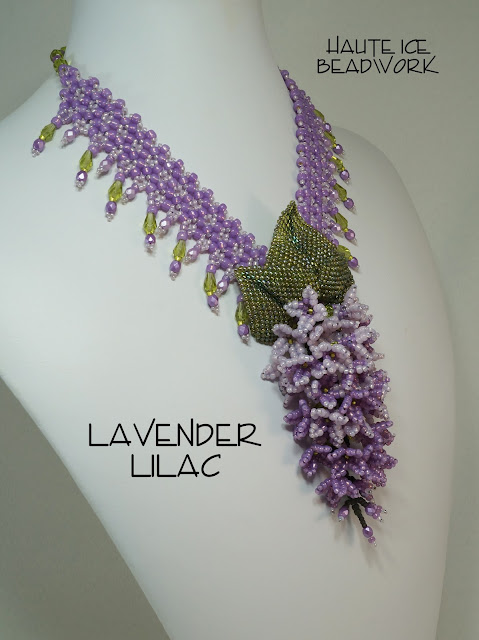
The Lavender uses Opal Silver Lined Toho beads, and a softer, rainbow finish bead for the leaves, for a generally springy and lovely look.  I did the gradation as it is done in the tutorial, but I am planning to do this one more time using a different idea.  I just LOVE the varigated lilacs that I recently discovered.  Here's a link!  Now, my flower pattern cannot really be used to create this edge detail.  BUT I think something magical could be done by using the kit beads in a slightly different way.  
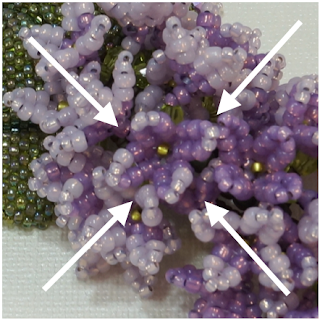
You would likely need the tutorial to be able to fully understand this, but I think if you were to use the A and B PALE beads at the tips of the all or most flowers, varying them slightly, sometimes just the A, or just some of the A, and sometimes 1 or 2 or 3 or even 4 of the PALE B, it might just be spectacular.  Like that one little flower above!  I put an insert with info about that idea in the Lavender kits.  So if any of you decide to give that a try, PLEASE SHOW ME!  I'd love to share it here on my blog!

If it seems like a good time to take on a BIG project, (these take me about 25-30 hours) and you feel like celebrating the return of warm, sunny days, and sweet-smelling flowers, stop on by MY ETSY SHOP! 

Wednesday, February 2, 2022

When People Use my Tutorials, and Add Their Own Personality and Skills

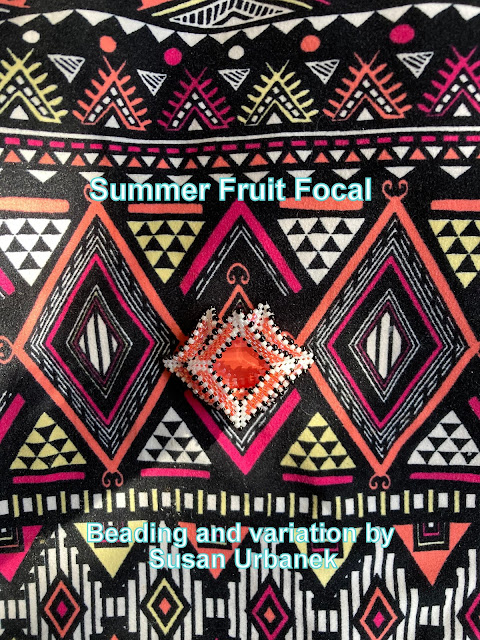
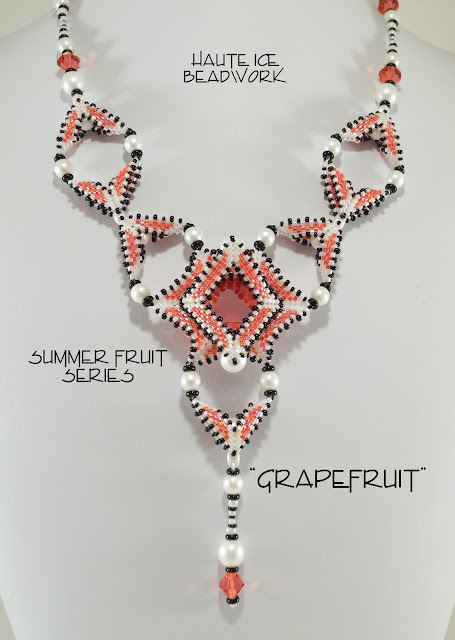
 Susan contacted me when she could not find her download of one of my tutorials.  We had a nice chat, and she went on to buy a Summer Fruit kit in the Grapefruit color.  I know orange tones are not everyone's favorite, but she assured me she loved color and proved it when she finished her focal.  She swore she had the wardrobe to work with it, and she DID!  I love this fabric!  It was her gentle nudge that reminded me I had the materials to re-kit Summer Fruit.  That was a good thing!

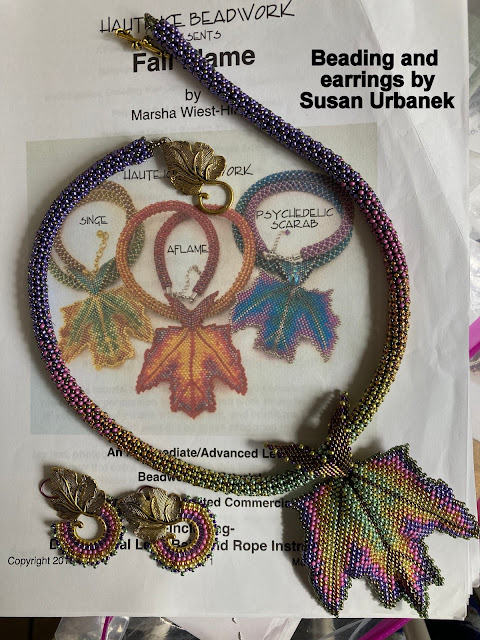
I was enthusiastic about her costuming, so she shared a Fall Flame necklace she had made, with coordinating earrings.  


   I think those earrings are inspired, and I also love what she did with the bead caps before the clasps!

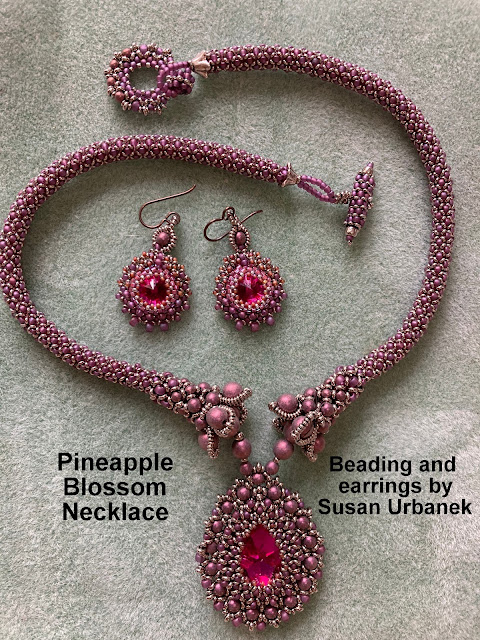
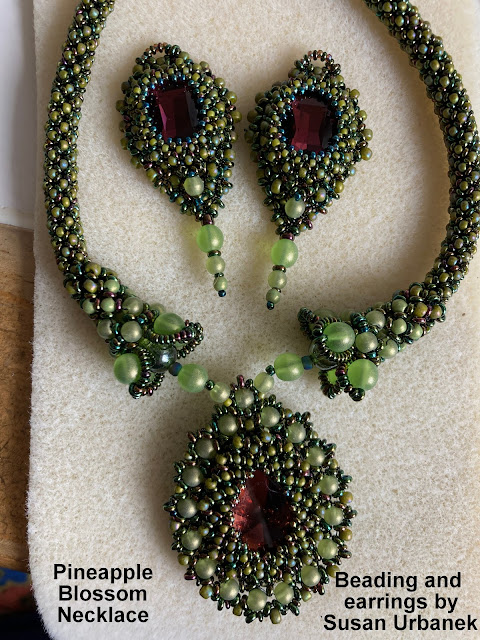
Then she sent me an image of her Fuchsia Pineapple Blossom Necklace, again, with earrings she created with leftover kit beads and some rivoli's she "happened" to have on hand.  Don't we all have stuff like that??


I love how she adapted my pattern to create the rivoli edges for her earrings!  
And again, an interesting bead cap and clasp variation!

And finally she had asked if I could put together a Green Frond kit for Pineapple Blossom, and of course, I had most of the materials, except for the Swarovski, which of course was no where to be found in quantity.  So she made up her own, similar colorway and again, matching earrings.


It's really rewarding to see my patterns made up, and added to, by my sweet customers!  

Thanks Susan, for sharing your ingenuity with me!  And letting me share on my blog!!

Visit my Etsy shop for these tutorials and kits and more here.


Wednesday, January 26, 2022

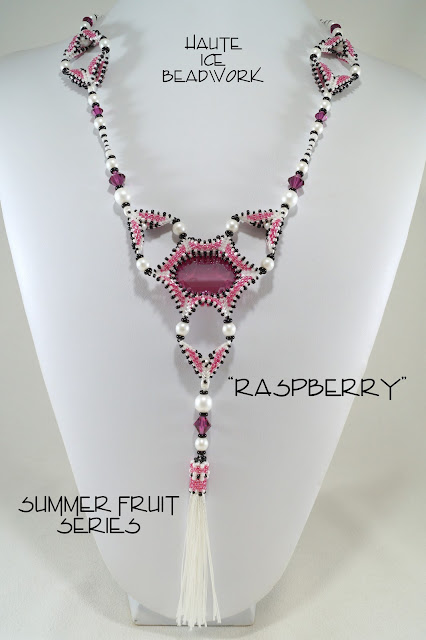
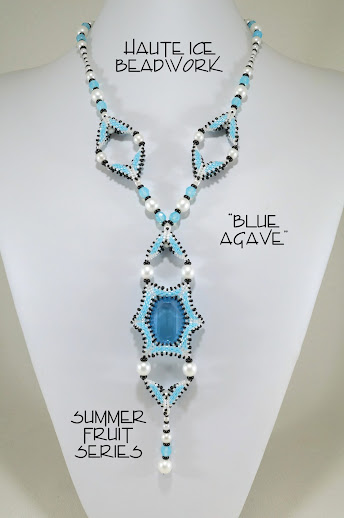
Summer Fruit Kits Back in Stock, and a Sale on the Tutorial

I am going to take the assembly of these kits as a big win! 


I felt completely overwhelmed when Swarovski shut down sales to mere mortals.  Between that and Covid, I found it hard to pick up a needle or a bead.  BUT...  I got busy with some Christmas beading and my mojo peeked out from behind its rock.  I remembered I had bought oval fancy stones to re-kit this project, and finally with a little nudge, and some help from a friend, it's done!


The tutorial allows for 5 different variations of an extended, winged bezel project.


And to celebrate, I am selling the tutorial at 25% off until next Saturday.  So if this project is of interest, now is the time to grab that tut!  And if you want, the Kits are now is stock too!

And MAYBE, just maybe, there might be a new project in the offing...  Crossing my fingers!

Monday, April 5, 2021

Some Butterflies!

Have a few kits for my various butterfly beadwork.  One of my buyers requested the Eostre Spiral Butterfly kit, so it is back in stock.  It has lovely Spring colors and a pretty hand-painted butterfly pendant.  You can find that kit by clicking HERE.  


The tutorial is right next door in my Etsy shop.

Here are a couple detail shots.  I especially like the Spiral Chenille stitch with the inserted scales.


And I love the lavender leather backing for the jewel.


AND... the hand-painted pendant.  


I found three gold Butterfly Bags that I had not sold while cleaning.  I started on a new applique, but while hunting for beads, I found a kit for the Pearl Monarch bag for which had never written a tutorial.  SO, rather than just toss that kit, I wrote a tutorial.  One of the gold bags got a Monarch applique, and is ready to ship, with the kit. Find the kit HERE.  Actually, it sold out really fast....  


 And the tutorial is HERE.  Here's the final chart, so you can get a feel for the process.


And I also found a complete Sunset Butterflies Kit.  So the second bag got the appropriate appliques and is also ready to fly to you for finishing.  Find the kit HERE.  And the tutorial HERE.


And here's what the beads and colors look like.  I love this little bag.


And that third gold bag... Well, before I looked for kitting beads, I hunted down a different applique and made a new bag, carefully taking photos, thinking it would be the one I was writing up as a tutorial.   Now, I guess I just have a new bag, as I cannot find any more of this gold silk.  


But I did find the green silk bags I had started eons ago.  So maybe those are up next.  


Monday, March 8, 2021

Dressmaking for my Beadwork

I really am kinda retired.  So I feel free to follow my interests as they appear.  I have been cleaning out my studio, and keep finding things that could be finished.  And some things that could be started!


This piece of fabric was purchased many years ago, and I pitched it to several of my ballroom clients, but no one took the bait.  I may not have pitched with great conviction, as I LOVED this print.  I may have (on many levels) wanted to keep it for myself.  Kinda wish I had laid it out flat for you to see, but this was after I calculated a place where I thought my necklace might fit and chopped a hole in the middle of the fabric to have a look.  It's a poly single knit, and runs in one direction, so I knew I needed minimal seaming. I decided on dolman sleeves, and shaping from side seams only.

Here's the necklace.

Sooo...  A couple days later...

I pleated the right side to provide a more interesting fit and bit of movement.
The necklace fits the space, and without being too matchy-matchy, feels OK to me with the print.
Pleating detail.  I am an inch larger than the form at the waist and at the hip.  I fill it out a bit better!
And here is the back detail.

I am having a lot of fun sewing in my studio recently.  Beading is feeling very sedentary to me, and I want to be more mobile.  But it's still nice to wear all that beadwork, especially in a new context!

And then, of course, there is THIS!  Let's hope it does not become a permanent wardrobe feature!

Stay safe and healthy!


Wednesday, January 20, 2021

How Beaders Use My Patterns Fascinates Me!


I am really fascinated by the things people like to do to my Fall Flame leaf pattern.  Judy set out on a real learning mission and asked a lot of questions along the way.  It's fun for me to be able to talk all bead nerdy with someone else who actually cares about that I am blabbering on about.

Judy wanted to shape her leaf differently and give it an additional vein and a more complex edge.  


I believe the darker leaf has just the two veins that my Sugar maple model had.  


But in her lighter red leaf, she added a third vein to each side of the leaf, and a much more complex edge.  I know she found it challenging to make the two sides match.  Trying to record and draw what you did the first time to replicate the second side is challenging!


I know there are maple leaves that have 5 separate sections, instead of the three (and hint at a fifth) that Sugar Maples have, and I honor her effort and achievement.  I find it inspiring.  I also found it interesting that she did not have an interest in the color ombre.  Pretty sensible really if you want the observers eye to take in the complex shape and edge.

She did a great job!  Thank you for sharing with me and my readers Judy!

If you want to play with this pattern yourself, you can find just the leaf and bail pattern here:
https://www.etsy.com/listing/477843955/etutorial-for-fall-flame-leaf-bail-only

If you want the rope too, look here for that tutorial:
https://www.etsy.com/listing/469164117/etutorial-for-fall-flame-leaf-bail-and

Visit my Etsy shop here, for all available kits and tutorials!
https://www.etsy.com/shop/HauteIceBeadwork

Saturday, January 9, 2021

A Little Peyote Bezel Presentation


 Monday, January 4th, the Upper Midwest Bead Society asked me to speak about bezels, and the resulting presentation was live streamed to facebook on the UMBS club page.  If you are interested in listening and watching, here is a link:  https://www.facebook.com/umbsmn/videos/157959159111866  Our business meeting starts about 1:05 minutes in, and my presentation begins at 5:15 minutes.

I speak about how to make a simple bezel, and then, how to add embellishment, create connections, and a little about designing with bezeled components.  I touch on square and rectangular bezels and a few other shapes, and provide links to blogposts about some of those shapes.  

It's a lovely club, and I believe the plan is to present a guest speaker the first Monday of each month live as 2021 proceeds.  Membership forms are available on the UMBS website here: http://www.umbs.org/membership.html  This first meeting was made available to anyone who wanted to watch, but I think the goal is to eventually have meetings available to members, and since we are presenting virtually, there is no reason you could not belong from anywhere on the planet with internet access.  

As always, thanks for checking in, and please stay safe!