Search This Blog

Tuesday, November 10, 2026

Bead Embroidery with Fabric

 I made myself a pair of semi-sheer trousers with some voided satin chiffon.  I adore them, worn over lightweight leggings!  And while cleaning up my studio, I got distracted with the scraps.  It's a cool print, with lots of fall color and movement in the shapes, quite like falling leaves.  Sooooooo...  I used the fabric scraps to make a little bead embroidered necklace!


And, I want to share the process with you.  I no longer want to write tutorials, but I am happy to share my experience and ideas with my beady friends.  See the yummy leafy patterns in the fabric?  And the beautiful colors?  Here we go!

Here's a scrap from the trousers with a nice leaf shape in the center.
                                      
And here's a piece of fusible web with parchment backing, (aka Stitch Witchery) ironed to the back side of the fabric.

Peel the parchment away from the fabric.

Trim away some of the excess fabric around the image, and fuse it to a piece of bead backing. For those who do not know, it's like heavy-weight Pellon interfacing.  It comes in a rainbow of colors to match your project.  

Then trim away excess bead backing, and with a fine tip pen, outline the edge of your image 
so you can see it easily at your sewing machine. With lighter fabric or higher contrast you might not need to do this step, but since my image and ground were so similar...

Then using a matching thread, and a very short stitch on your machine, 
outline stitch the image you want to bead embroider.  Take your time and do the best job you can.  Accuracy does matter.  You are establishing the edge of your embroidery project.

Then, with a super sharp scissors, trim away the excess fabric and bead backing as one, right next to the dense line of stitching.  I changed my mind at one point (by the purple arrow) and 
adjusted the shape of the edge there.  I left the stitching I didn't want, as it would have been hard to remove, and I intended to cover it with beads. 

Then I visited my obscenely large, retail-quality bead stash and pulled a palette of colors. I liked the range that was represented in the larger piece of fabric, as well as the beautiful fall world I see on my daily walks.  I chose a gradation from purple through dark red, to brick, orange, and finally, gold.  Then I chose a mottled gold bead for the outline, wanting it to blend with the colors a bit.

Then I began outlining, in mostly backstitch three and some four, for maximum control and durability.   For those who don't know how that works, here's a diagram of backstitch four, just to get a feel.  You can use any number of beads, up to maybe 8, but the fewer beads there are, the more stability and control you have.

Backstitch Four
Step 1                Step 2                Continuing

I tried to wrap my hand stitches from the outside of the machine stitching line to the inside on the back as I backstitched, again, wanting to keep the edge super stable, and counting on the fusing and stitching for stability.  At this point, I became very aware of the beautiful movement in the textile design lines, and decided to accent them with my outline beads.

With the outline complete, and the movement lines accented, I decided to arrange my ombre gradation from purple at the stem, to gold at the tip.  This leaf does not really represent the range of color in the fabric as a whole, but I wanted to see it all in the leaf necklace, regardless.  I chose silver lined beads, which are quite luminous, and will not allow the background color to affect them very much.

Here's an image of the back at this point.  You can see how I tried to wrap the outline stitches around the line of machine edge stitching.  I also find that, when working on bead embroidery, I do not need to tie off and re-start my thread when moving to a new start, since the work is on stiff bead backing, will be glued and leather backed, so those long overshots will be stabilized.

Here's the beginning of my fill stitching.  I'm trying to accent and define the movement in the original lines of the leaf, and also to put the gradation of color where I want to see it.  I'm now using backstitch 6 mostly, and still have to run my thread back through some of the lines to clarify and straighten them.  Most people have a tendency to try to wedge in too many beads when embroidering, and I see myself a bit guilty of that, so will also back off as I continue.  I am using mostly 11/0. but some 15/0 as needed.  

I worked the tip of the leaf to get a sense of the color shift needed, 
and now I can confidently fill the remaining open space.

OK!  All the fill is done, and now it's time to back the leaf with leather.

My vast leather scrap box had some lovely metallic finish red!  I laid my leaf on the back of the leather, drew a narrow line around it, and trimmed the leather away from the large piece.  
Now I'm ready to glue the pieces together.  I use leather glue, because it remains flexible, 
and does not crack if I bend the finished work slightly to enable the edge stitching. 

I used the applicator tip of the glue bottle to apply glue to the back of both the leather and the leaf, spreading it to an even, smooth coating with the spreader tool. then I pressed the leaf to the leather, and lay my heavy tool box on top of the stack, so assure all points were well contacted.  After 15 min or so, I took off the tool box, to allow the adhesive to breathe and cure overnight.  When I could no longer smell the glue, I trimmed the leather to the leaf edge, with my super-sharp pointy tipped scissors.

Then, I began the edging process.  This is essentially a buttonhole stitch that incorporates beads.  I place my stitches from the back side, so I know they are all evenly spaced and super neat.  Then on the face, I sneak my thread under the edge beads to pass through the bead again, like the end of buttonhole stitch.  If anyone REALLY WANTS to see how I do this, I could make a video.  Let me know.  :)  This process guarantees that the three layers (fabric, backing and leather) stay neatly together and don't reveal any of their glued, fused secrets.

At the very top of my leaf, I added a 6/0 Demi bead to serve as a mobile connection point.  This could have been a metal loop. but given sewing it on, it would have needed soldering, and that is beyond my skill set.  Also, I know this is a fuzzy photo.  I had forgotten how challenging taking good photos actually is.  Yet another reason to enjoy my retirement!

And here is the finished piece.  I used my Fall Flame tutorial to make the rope and bail.  
The photography is so challenging, but honestly, I have forgotten SO much about using an actual camera, I'm afraid my iPhone photos will have to suffice.  

I hoped you learned a little bit about using printed fabric to create bead embroidery.  It's something I love to do.  And rest assured, if you love the imagery, you don't have to cover it!  
Sometimes, just outlines and accents are enough! As in this example from almost a decade ago!


As always, HAPPY BEADING!

Friday, February 13, 2026

Love Melts ICE

 It doesn't have an official name, but if it did, I think it would be Love Melts ICE.  


Poets write.  Singers sing.  Painters paint. So I wanted to represent in beads what I have seen and experienced here in Minnesota in the last months.  The best words I have to explain it are an "illegal ethnic cleansing by undertrained, over-zealous federal militia".  It's been frightening, it's been sad, it's been an economic disaster.  But I don't like things that are hateful and ugly, so I have tried to allow my representation of ICE to be more organic and beautiful than it actually has been.

The most important point of the work, for me, is that Minnesotans have stood up against unlawfulness and cruelty.  By being kind.  By making it clear that what we are seeing every day is simply not OK, and supporting neighbors as we are able.

So I began with a heart, purchased long ago from an glass artist, Alana Reifel, from Michigan.  I looked her up to see if I could link to her art glass, and discovered she is no longer living.  I hope she would have appreciated the use I am making of her beautiful blue heart.  Blue for Minnesota and our many lakes. Blue for our cold.  But not our hearts.

I made a pattern, and cut a heart out of white heavy weight pellon backing.  I dug through my lace scraps to find some scrollwork that suited the scale, arranged it to my liking,  and fused it to the pellon.  then I glued the heart in place and cured it overnight.  I am usually a person who bezels focals, even when I am embroidering.  I never feel like they are safe without being secured in place, as below.

But in this case, no one, and no hearts, are genuinely safe.  So I figured this one should not be either.  I first used some blue beads with a finish similar to the heart, to draw some growing tendrils of warmth through the work, used the leaf motifs like little signs of spring melt.  Then I began icing over the rest of the heart.  

I worked at icing for about a week, and then made a mistake.  But given that this process was very improvisational and not at all "designer-ly" (no sketches, either on paper or in beads were made) mistakes are a natural part of any learning process.  The two steps forward, one step back dance I am used to, might have saved me from it. but nope, it crossed my mind and I just did it.


I thought "It doesn't need to be so strictly a heart.  I could round off the edges and make it a more organic shape."  But sadly, I forgot one of the problems with any symmetrical construction that has a center and then two elements on either side.  It either becomes a face, (in this case a rather pudgy one!) or if there are just two appendages on either side of the focal component... well, I'll let your imagination run with that one.  But sadly, neither is good.  SO.  I glued and stitched the heart shape back in place and proceeded with the icing.  For those who know me, I went through a lengthy cake decorating phase, before I discovered beading.  The implications all fit.  

Finally, the entire face was "iced", and I glued on a white leather backing. You can see where I added the heart shapes back on, and bumps from my knots. Edges are finished with what for me is a buttonhole stitch, that includes a bead.  And then I could not resist doily-fing the edge with some picots, and drippy drops to indicate melting.  I believe backs should be beautiful too, and always do my best to get stitches neat and even, but improv leaves it less than perfect.  


You might also note the neck strap visible here without the distraction of the front.  One evening, people in Minneapolis made a huge SOS on Lake Bede Maka Ska, and I wanted to encorporate that distress signal in my work, so the Morse Code dots are represented by Czech Fire Polish beads, and the dashes, by bugle beads.

Often my large, gaudier work is for special occasions only, but I'm going to wear this frequently, and yes, as beaders often joke, even to the grocery store.  Like, right now.  And maybe every day.

I love you all.  I am a centrist, who has leaned both right and left over the course of my voting life.  But it does not take a rocket scientist to see that "something is rotten in the state" today.  I hope we can join hands and reclaim our democracy, before it is too late!


Friday, April 28, 2023

Spark Kits in Stock Tomorrow!


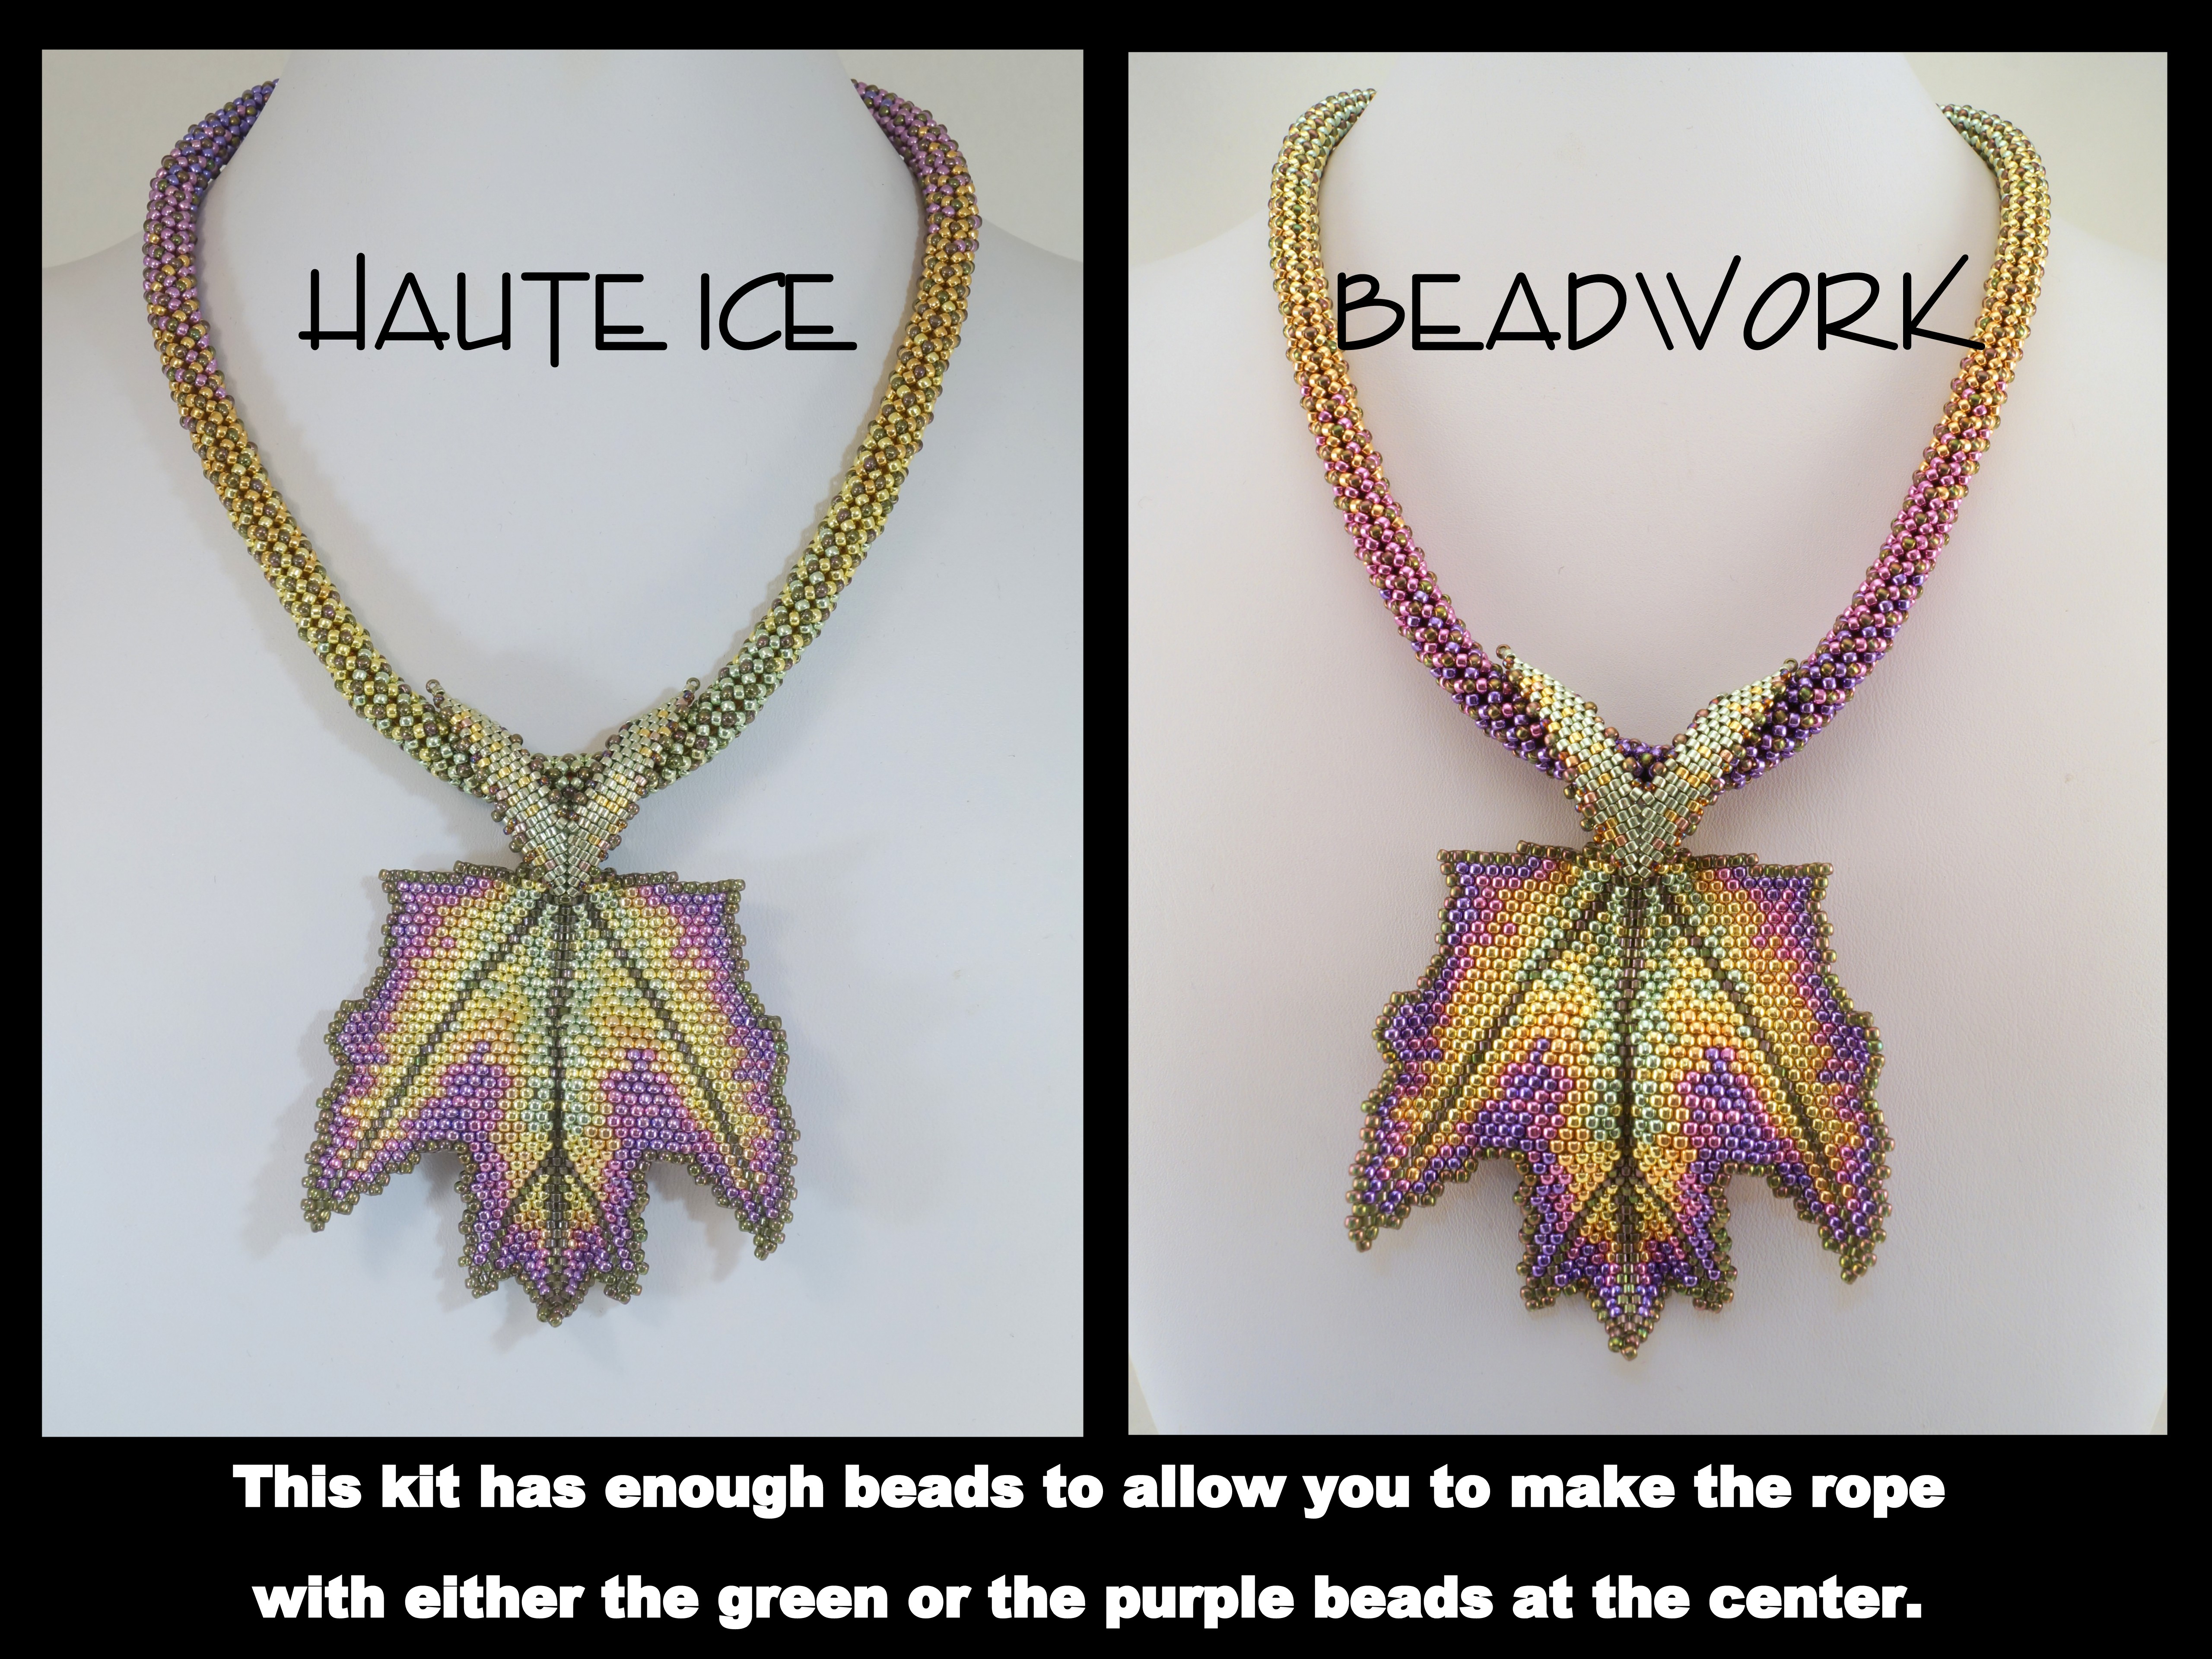
Many of my Fall Flame necklace kits allow you to make the rope with either the A beads at the center, or the E beads, as the tutorial is written.  To accomplish this feat, you can simple re-label the A beads as E, and B beads as D.  C remains C as usual. I believe you could also change the leaf around if you prefer, but honestly, I like the contrast between vein and leaf, and I think that would be lost if you made that switch.  BUT it's YOUR CHOICE, to make.  

For the next week, I'll mark the tutorial for Fall Flame down 25%, so if you want to try your own colorway, please feel free.  Many people have done so, very successfully, and enjoyed it.  

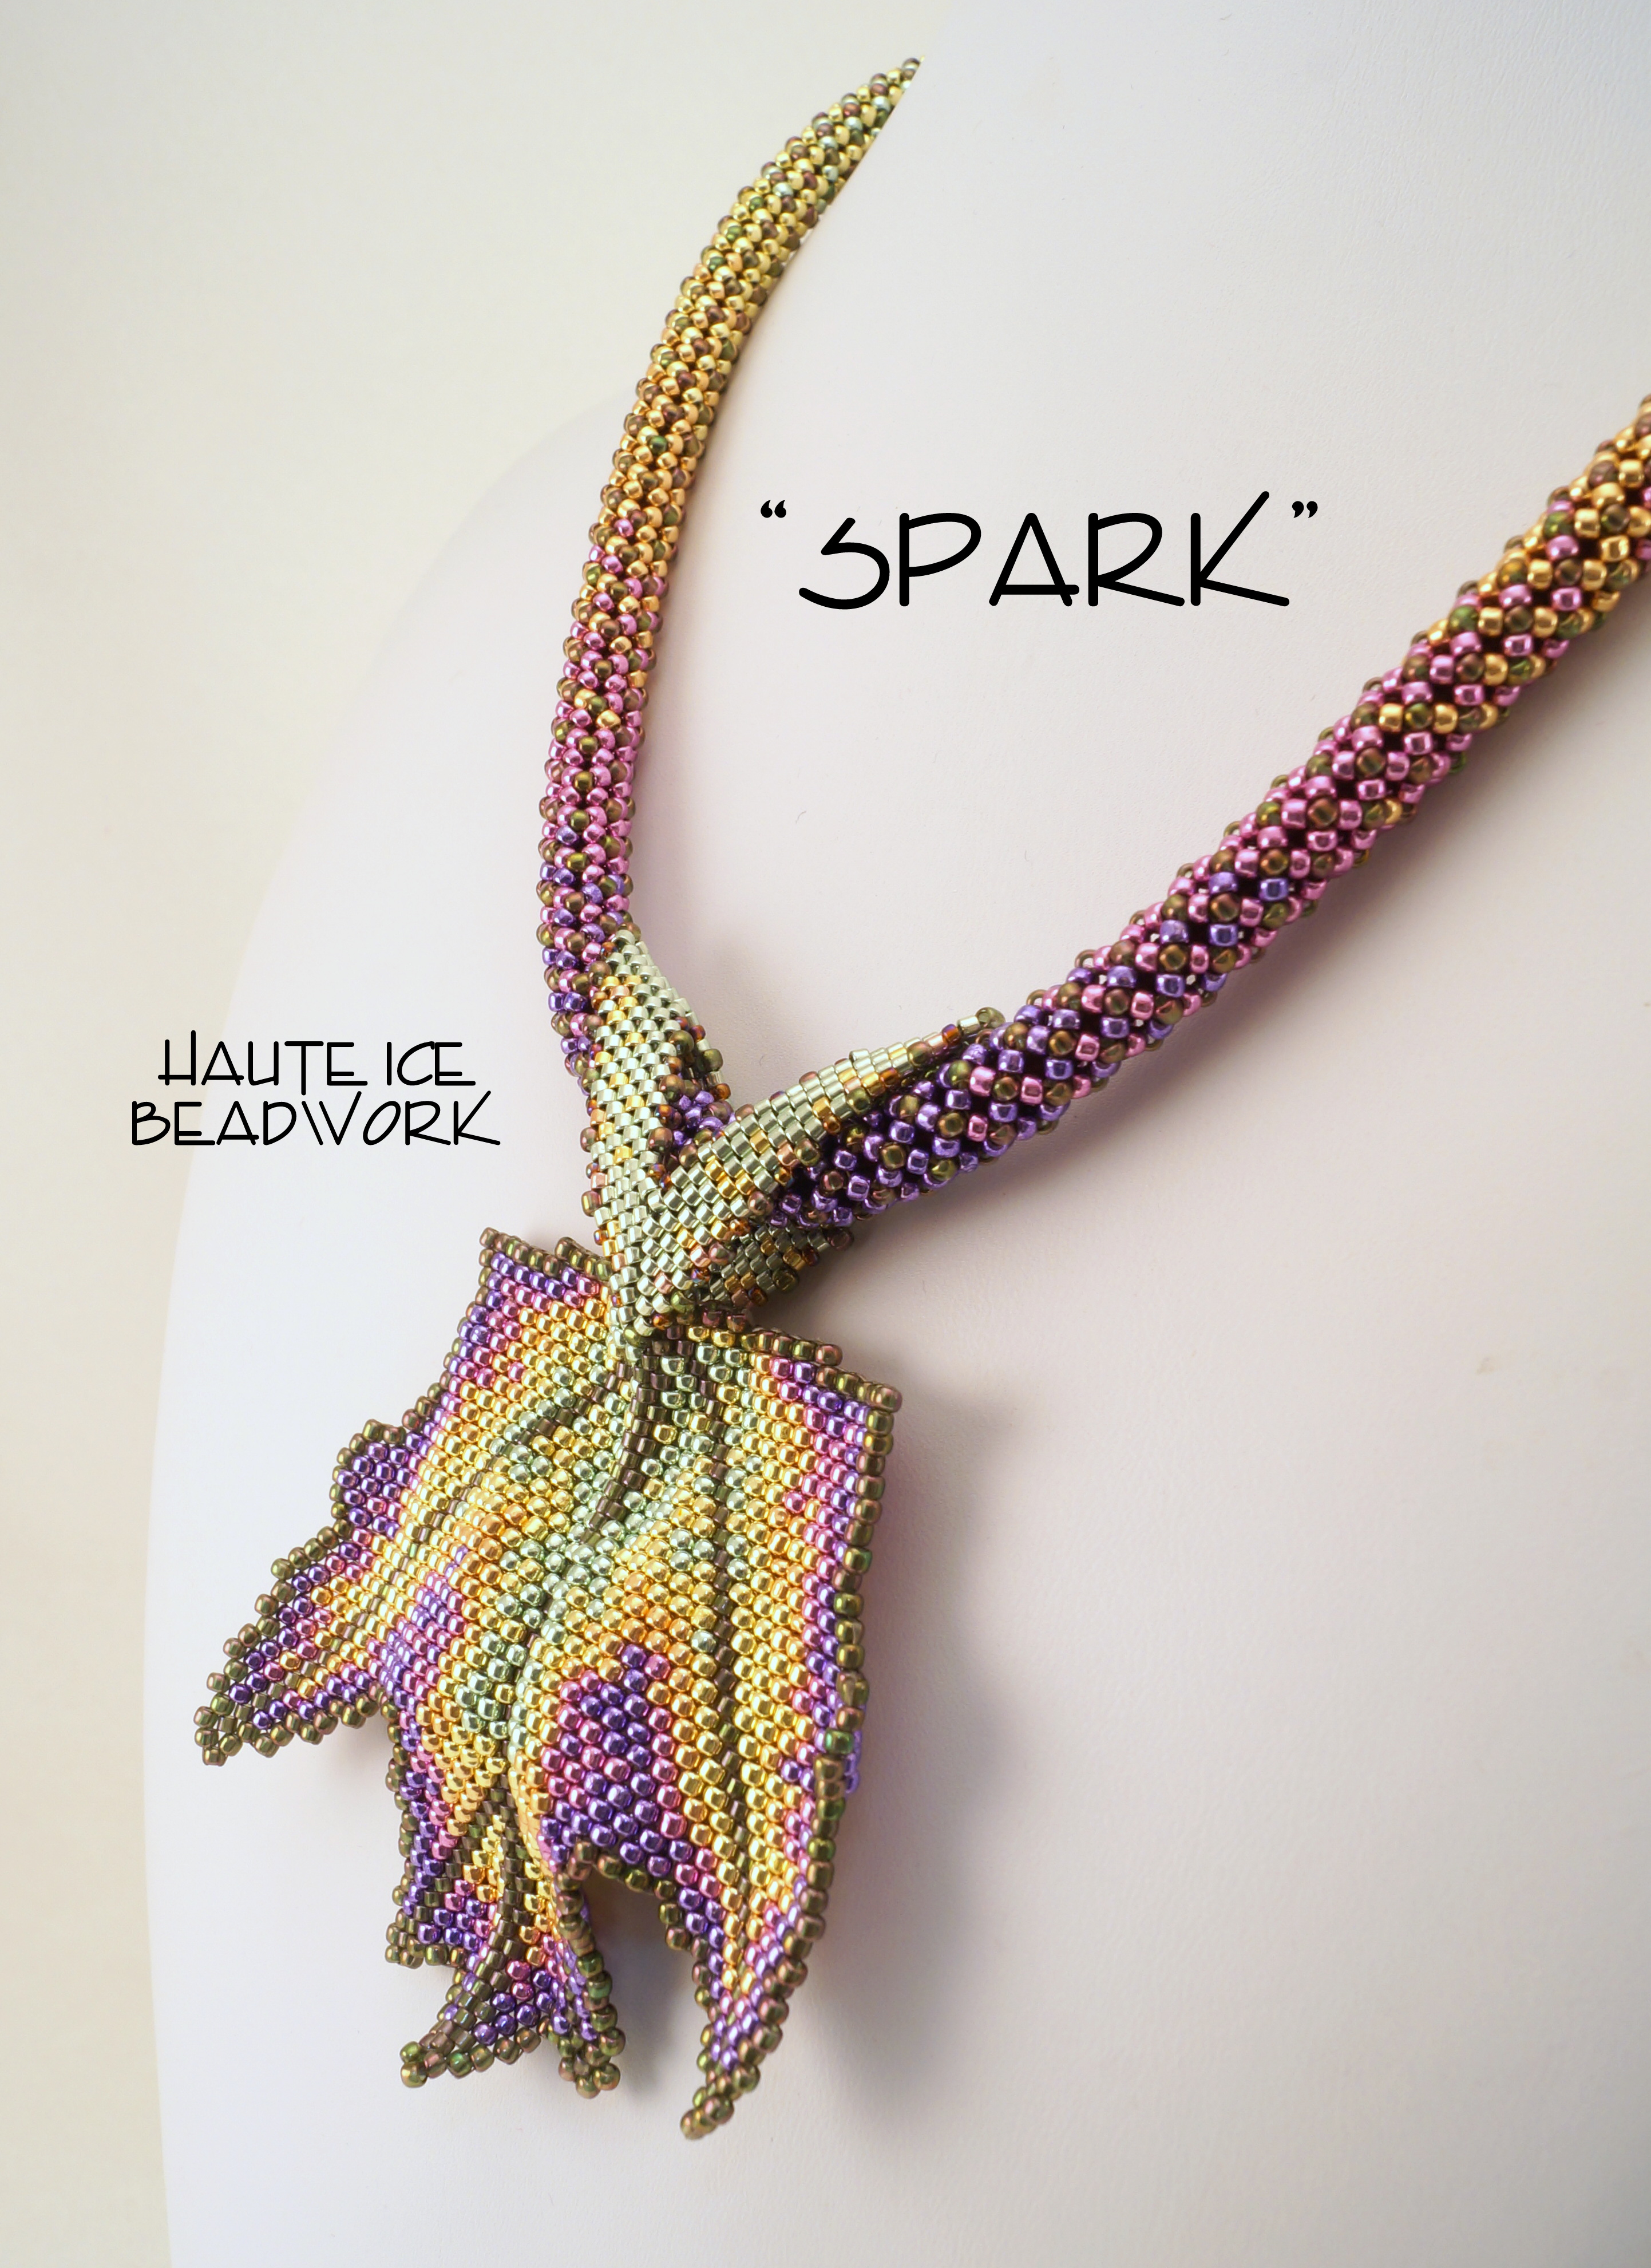
What I love most about this colorway is it's Spring into Summer look.  And it looks great with many different clothing options.  I had to do a little styling for you!

I love it on my favorite little black summer dress, as well as with citrusy lemons and limes.  It also looks great on deep avocado, since the vein is a complex bead that features that color with a pinky glaze, and this year's Viva Magenta was made for this lovely leaf.  

If you want to try the beautiful shapes and ripples of this leaf, and you don't want to wait for any of the more Autumnal color versions, this is for you, right now!

I'll put the listing in my Etsy shop tomorrow morning, April 29th, 2023, at 9am CST, and pop back here to drop a link for you then.  I have nine of these kits, but if you miss getting one, I could make a few more, so just drop me a convo.  

I'll leave you with this above closeup, and this side view, which reveals it's shapely natural curves.  

Saturday, April 15, 2023

Bermuda Dragon Kits Re-stocked

I had a request for a Bermuda Dragon kit, and making just one is just insane, so I made 10.  Then I put them in my Etsy shop today and now there are 4 left.  Yikes!  Just when I was thinking it was time to fully retire.

I imagine it might be nice in the summer.  I have always imagine it breathes frost, or at the very least a cool breeze, so I suppose it might be a good portable AC unit, lol!

I used the last of these cobalt blue crystal rondelles, so had to substitute a 6mm X'waro round for the last couple kits, but I think the result will be equally lovely.  I also think the charm painting was some of my best this time around.


It's a pretty kit, with a yummy result, and it's going fast.  I thought I was past needing to post a a pre-notified time, but if you want to snag one of these, best move fast.  

Here's a link:  https://www.etsy.com/listing/1357803903/kit-only-for-bermuda-dragon-necklace

OH!!!  And I put the tutorial on sale, 50% off through next Sunday the 23rd, 2023, so if you don't already own it, grab it this week.  https://www.etsy.com/listing/555566974/tutorial-only-for-dreamscape-bermuda-and

Hugs and happy Springtime, wherever you are in the world.  

Saturday, March 11, 2023

Fall Colors for Caramel's Claws Necklace in Cinnamon


I was asked for kits in both the Sage and Cinnamon colorways, and have been out of them for ages.  It's really hard to find viable focals, but I have a set of each colorway now, and I am happy with the choices I have gathered together.  Here's a quick rundown in a larger scale than I can show you on Etsy.  These will go live in my ETsy shop tomorrow, Sunday, March 12th,  at noon CST.

Some deep jade greens, with cinnamon swirled throughout.  Deep and mysterious.

The most old-school Red Creek Jasper in the group.  Spectacular, and the last of its kind that I can find.

Also quite a classic collection of Red Creek markings and colors.  
Predominately cinnamon, with golds, greens, and deep, dark veining.

Nut brown with jagged deep green veining, and just a few hints of gold.

Various shades of brown and copper with a quartzy lightning strike.


The simplest of the group, in deep rich chocolate.  
This focal would feature the pretty curves and details in the bezel.

Some interesting dark inclusions in this focal bead, with creamy highlights.

The dark tones in this focal are almost purple, maybe best described as midnight.  
It has a petrified wood quality.  Unique and unusual.

For this week, I will leave these kits priced as they are at $52.  A kind of sale, because as I calculate my kit cost each time, it seems to go up, just like the cost of housing and groceries.  Then, on the 18th, they will go up to $55, so if you are interested, grab your favorite by St. Patrick's Day, to take advantage of the old pricing.  Caramel's ancestors demand to be fed, and the cost of peanuts has gone up...


Wednesday, March 8, 2023

Fall Colors for Caramel's Claws Necklace in Sage

 Three different people have recently requested kits for the original colors of the Caramel's Claws Necklace.  I have Berries and Honey, but Cinnamon and Sage have been sold out for quite a while.  So I decided it was time to try and make a final few more of each colorway.


The SAGE kits are done, and will be posted in my Etsy shop tomorrow, March 8th at noon.  It's a challenge finding respectable focal beads, as the Red Creek Jasper vein appears to have been mined out, but I am happy with my choices, and hope you will be too.  So without further ado...

I love the markings on focal A.  Those slash marks have their own highlights!

Dark and dreamy.  And it looks as though it has been dipped in chocolate.  
Would really feature the bezel nicely, as do all those with darker markings.

Focal C has two interesting curved markings and they mesh nicely with the bezel curves.  
Each focal has two sides, and sometimes I like both, despite mild pitting.  
Which side to use is always your choice.
Similar to focal C, this D focal has a dark ground with lighter shadowy markings, 
so also simpatico with the bezel.
Focal E is soft, milky green-grey, with warm caramel.  An interesting stone.

Focal F has three distinct zones, and the warm chocolate brown relates nicely to the wood beads.

If only I had turned the G stone the other way, you might have seen a Mocha Frappuccino with a hint of mint! And this mocha also compliments the beads, and the hints of gold 
in the bezel edge of Oceanic Metallic 15/0 beads.

I also have a final set of Cinnamon kits underway.  I am waiting on a few final beads, 
and I'll keep you posted.

Find this listing at the link I will post here tomorrow.  For now, it's just a link to my Etsy shop.  

https://www.etsy.com/shop/HauteIceBeadwork