Search This Blog

Sunday, November 2, 2014

Maltese Squircle!

Occasionally I am asked to solve a bezel problem, which kinda delights me. I recently agreed to try a shape for Cindy, who sent me a Swarovski Squircle, because I could not find this item locally.  Or that is what she called it.  And it is a pretty descriptive name.  The jewel is mostly a square, with rounded corners. A SQUare cIRCLE!  I wish like crazy that I had taken a picture of it before I started working with it Friday evening, but I did not.  So you will have to trust me when I tell you it had a gold foiled back.  And it was 18mm across its widest point, according to my caliper.  Now Swarovski, according to the Create Your Style site, has a NEW cut, #4470, which looks very much like this one.  But it is only available in 10mm and 12mm.  And in the picture, the "new" jewel has a silver foil backing.  So from this evidence, (and the color looking like Tabac or maybe Sahara to me) I will guess that this item is vintage cut #4471.
SO this may not be the most universally applicable bezel, but I do hope Cindy likes it!

When I looked at her picture, I thought the shape was pretty, and that there should be a way to bezel it to emphasize and delineate the lovely shaped edges.  I decided first to apply a leather back to it, both since I believed is was old, and because of the sharp point on the back.  I thought that point would be vulnerable to chipping, and not be especially comfy either.  So I cut a chunk of lambskin about twice the size of the jewel, warmed it with my iron, stretched it over the upside down jewel, and waited while it cooled to create a pointy pocket.  Then I applied some E-6000 to the back of  the jewel, pressed it into the leather pocket, and dropped it into my rice bed to dry.
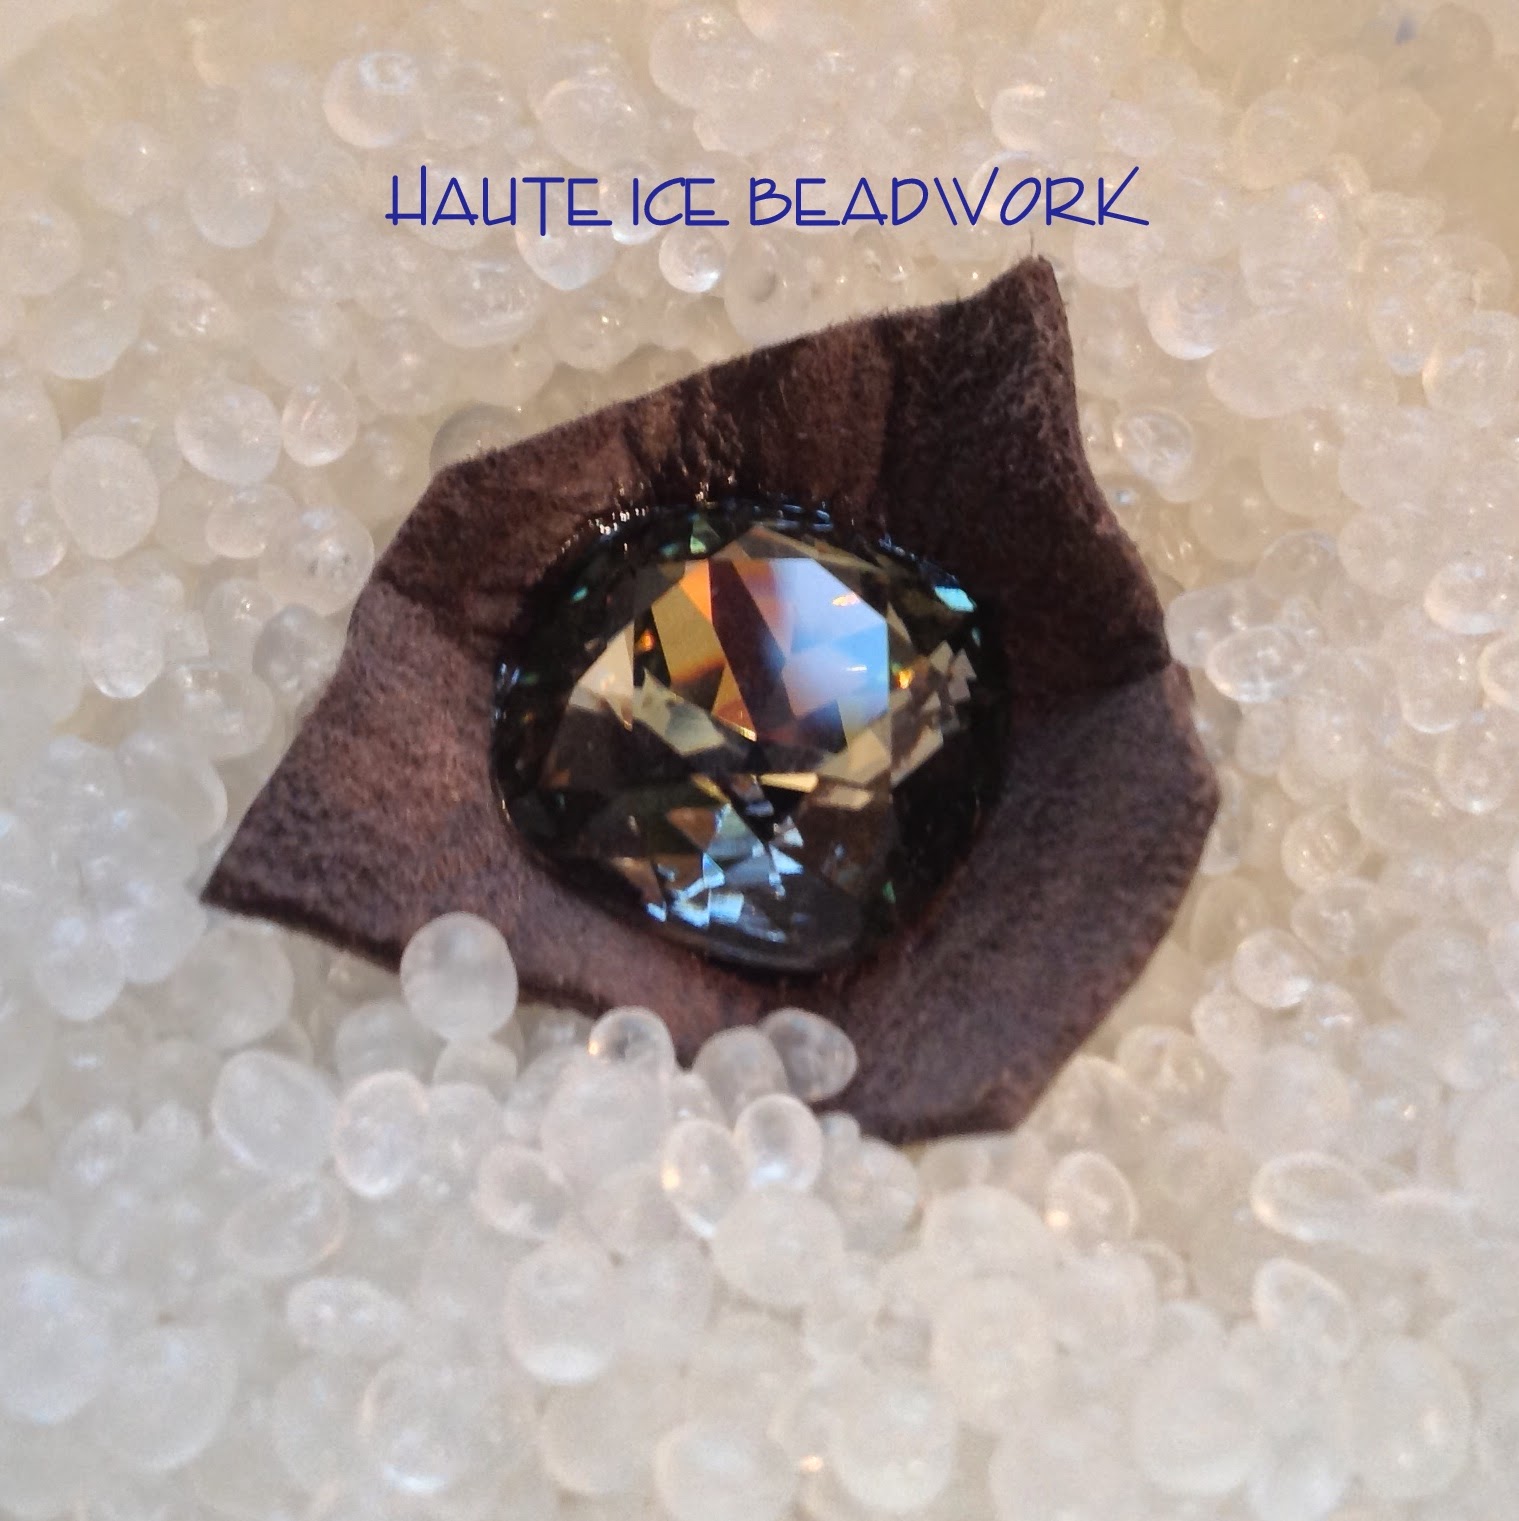
Ok, true, my rice bed is not rice.  It is Poly Pellets, which is a craft store weighted stuffing material. But it does a great job of holding oddly shaped things while they cure.  After the drying was complete, I trimmed the leather back neatly to the edge, and chose two contrasting colors for the bezel.
I chose a light, shiny metallic delica, (24k green gold) and a dark, matte metallic delica,(Jet AB), and 15/0 seed beads to match.  You could be much more subtle than I was by choosing the same color in shiny and matte, but I wanted the finished piece to be for daily wear, with a nod toward denim, hence my choices.  Also I wanted to show you clearly what I was doing and thought the two colors would be helpful.

For all four (and like in this case eight) sided figures, we need a number of beads to begin with that is divisible by four.  If you want to read some general info on geometric bezels look here, and specifically for octagons, look here.  I found that 48 beads was perfect, not too snug, not at all loose.

Rows 1 and 2: String 5 dark, 7 light, four times total, and then go through the original bead again to form a circle.  If you need help getting started with appropriate tension, you could put a knot in the circle before going through the original bead again.  I just hold the tail tight,
Row 3: Peyote one full round, holding the work flat, and matching colors. Step up into the center of the circle.  
Row 4: Begin to curve the dark corners by stitching a 15/0 at each edge of the dark section, and matching delicas everywhere else.  So begin with 1 dark delica, then 1 dark 15/0, 3 light delicas, and 1 dark 15/0, repeating three times.  Stitch snugly, (but not super tight) encouraging the dark corners to round out as you go.  Poof, squircle created!  
(Now it would be possible to finish the face of this bezel simply from this point as I do on the back of the bezel, in row 12, but I thought some geometry would further emphasize the pretty shape and cover some of the sparkle power, since I wanted this to be a casual piece.  So hang in there with me for now, and if you want to see more of your stone, you can simple replace the next row with row 12, and call it done on the face.)

Row 5: In this row, we will add two more 15/0 to the dark corners, and two 15/0 to each light edge, to begin to create a triangle peak.  SO, 15/0 dark, 15/0 light, 2 light delicas, 15/0 light, 15/0 dark, repeating three more times.
Row 6: A tricky row, and I officially WISH I had time to learn to use Illustrator, so I could make it more clear for you.  The picture above shows the first three stitches in row six, as well as all of row five. Notice I DID NOT step up after the last stitch in row 5, but carried my thread ahead through the work to the first light 15/0.  THEN I stepped up and stitched the first three stitches in row 6, one 15/0, one delica, and one 15/0 in light.  Then I stepped DOWN, into the previous row (the first dark 15/0) and will stitch the final 15/0 in the peak of the dark corner.  Then I step back up through the first dark 15/0 to continue with the remaining sides in the same manner.
You will go through that first dark 15/0 many times.  If you are not using a size 12 needle, switch now to avoid breaking that bead.  I set the bezel on the stone to show you row six completed above.  I left a space between the dark corner peaks, both because to add a bead would be to excessively tighten the face of the bezel and because I am trying to emphasize the shape.  See the place where the bead is missing, just before where my thread exits?  I hope this is clear!

Rows 7 and 8:  In this round, we will stitch two rows onto each of the light peaks, and step down through that original dark 15/0 to cross the completed dark peaks.  Step up into the second light 15/0, and peyote two stitches with light 15/0.  Then turn your needle as in the picture below to back up and allow yourself to apply the final 15/0 to the peak. Here's the needle, creating the first turn.  I stitched the first light peak to show you what you are trying to accomplish here. 
After turning, work across through the bezel three beads, and turn again, up into the 15/0, to position yourself to add the final peak, as in the photo below.
Apply the peak, sneak your thread back down into the original dark 15/0, pass through the bezel to the other side of the dark corner and finish off all the light peaks in the same way.  
Here is our bezel and our Squircle Jewel, which are now ready to be BFFs.
Install the jewel, and if you are like me and want to continue to work counter-clockwise, turn your needle to allow that.  See how the negative space forms a Maltese cross?  Love that!
Row 9: Peyote stitch 3 light delicas and 3 dark delicas, four times total, and step up into the new row.
Row 10: Peyote stitch 4 light delicas and 2 dark delicas, four times total and step up into the new row.
Row 11: Peyote stitch 3 light delicas and 3 dark 15/0, four times total and step up into the new row.
Row 12: Peyote stitch 4 light 15/0 and 2 dark 15/0, to finish the back and step down into previous rows to turn your thread a few times to secure the work.  Work in the original tail in the same way, or use either thread for additional embellishing or attachements, but I suggest that you make each thread secure before using it for other purposes.
I do think that rows 11 and 12 could also provide the face of the bezel, but I personally like the geometry and shapes highlighted.  To my eye, this looks mosly round, but if you do the first contraction in the dark corner only as illustrated here, it does create the shape and would allow more of the sparkly stone to be visible, if that is your purpose.  Both ideas will work to create the square sided, round cornered octagon that is this jewel.
OH, and here is my first sample effort, using nearly the same color in matte and shiny delicas, with a bronze matte edge accent on the curvey corners.  As you can see, the same or similar colors in different finishes could be amuch more elegant, less casual frame.
Thanks Cindy for your kind words, a fun challenge, and a pretty jewel, and I hope you enjoy your Squircle as much as I am enjoying mine.  I added a little lace to my bezel with square stitch and netting, strung it as a simple pendant, because soft golden greens are plentiful in my wardrobe, and I want to wear it often! Here's my finish for this bezel, which I do not think I can show you without Illustrator's help.  But feel free to riff off my idea.  I thought something swell could have been done with Herringbone  stitch too.
Why Maltese?  Well, it popped into my mind, and the Wiki Wisdom on the symbology is that the eight points of the cross represent the eight obligations and aspirations of the Knights Hospitaller.
Excellent rules to live by, IMHO, and ones I am happy to wear around my own neck:

1) to live in truth
2) to have faith
3) to repent one's sins
4) to give proof of humility
5) to love justice
6) to be merciful
7) to be sincere and wholehearted
8) to endure persecution  

That last bit, I officially suck at.  But occasionally I can swallow my annoyance and live with it.  


Tuesday, October 14, 2014

Upper Midwest Bead Society 25th Anniversary Fun!

I had such a lovely afternoon!  The Upper Midwest Bead Society 25th Anniversary celebration was held in Eden Prairie, in a pavilion in an Autumn-colored woods, with huge glass windows.

I stepped through the door, to find my friend Jean Erickson, visiting for the occasion from her new home in the Southwest, and it was great to see her!  I really miss beading with her before meetings.

She took my picture.  I SHOULD have taken hers!  I got to wear my new beaded vest and cuff and while I was pleased, I also learned loads about where I want to go with these ideas.

I also saw my friend Ann Gilbert, who was one of my first beading teachers at the original Bead Monkey, and I was honored to sit between her and the founding mother of the society, Diane Fitzgerald. Besides being a delightful lunch companion, Diane wore a FABULOUS long beaded sleeveless coat, which was to die for!  We were served ribbon sandwiches, which had such a vintage flair that I thought my mother could have made them.  Layers of pimento, egg salad and your choice of tuna, chicken or ham salad.  Delicious!


Society President Nancy Miller talked about what life was like back in 1989, without the internet. She showed us a beading book from the period which was printed in black and white, was spiral bound, and had four pages of color pictures. Diane then talked about how she single-handedly created a group of beaders over the course of five years.  This was before e-mail and facebook, so she announced meetings with hand written postcards.  Wow, what energy and determination she had!

Glass artist Jeff Barber created a special limited edition anniversary bead, and there was a friendly contest to use the bead in a creation of your choice.  There were a range of entries, from jewelry to a stained glass creation to hang in a window. 

The event was judged by Jean Campbell, and my friend Jean Erickson took second place with a wonderful necklace with included micro macrame. The imagery reminds me of Diane's "Finger's in my Pocket Dolls", but in this case, the fingers are in plain view!
2nd Place Winning Beadwork by Jean Erickson, photo by Jean
Another friend, and my very first teacher, Barb Knoche, won first place with this glorious, reversible necklace. 
!st Place Winning Entry by Barb Knoche
  Jeff also chose his favorite entry and it was Barb's piece as well!  Here's the other side. 

Both of these photos were taken by Barb and used with her kind permission.

And then there was a People's Choice category, which I was surprised to win. I think combining lampwork and seed beads is a big challenge.  Thanks UMBS members!  The voting was blind, with no names on work, but some of my friend's work was recognizable.  :)

Here is my entry, and the Anniversary bead.

The committee who assembled the event did a fabulous job, with a door prize for each attendee, wonderful food, beautiful table settings, goodie bags, and a super program.  THANKS SO MUCH to everyone who worked so hard to make this all come together and all those who generously gave goodies and door prizes. And Happy 25th Anniversary to the Upper Midwest Bead Society.  You did a GREAT thing Diane Fitzgerald!

Tuesday, September 23, 2014

Testing... 1, 2, 3, 4... 5... 6...


I have been thinking about making bead embroidered clothing for almost four months now.  And it has been hard to start, because I knew the results would not be very swell the first time.  But I am going to share my struggles.  Because both of us can learn from my mistakes, eh?

 Lesson #1
If I want to keep using quilted dupioni silk as a base, I need to contrast the embroidery with the silk color.  Matching it doesn't work.  I am used to working in the super-bling of rhinestones, but the beads do not have enough punch of their own, (unless I am planning to be very subtle) to be the same color as the busy textured ground.  If the ground was not quilted, it might work.  I do like seeing some fabric in this piece, but I can also imagine loving entirely filling the graphics with beads.  But, wait... weight!  But the idea of using floss in conjunction with beads is pretty juicy too!

Lesson #2
I was so excited when I realized that I was finally ready to give this a try, I did almost zero design work.  I just flew by the seat of my pants.  I grabbed a quilted vest I owned, patterned a similar vest, chopped it out and laid out applique on it as fast as I could, so I could start working with the beads.  
Fine, but if I want to produce something gorgeous, I need to plan.  And since I am planning to make the garments myself, I need to start with the design of the garment, and THEN the design of the embellishment.  No more wasting energy on making it up as I go along.  

Lesson #3
I don't think I want to use bead backing.  I want the garments to stay as supple as possible, so tension is everything.  And I have a notorious tight hand with a needle. So I must pull the thread taught and STOP.   I don't really see a way to put the work in a hoop, so I have had to learn to keep it completely flat where I am working, so I do not cram in too many beads, another of my favorite things to do. Every time the lines buckle, too many beads is the problem. Took me a long time to catch on.  
 I started at the top and worked my way down with the scroll work.  You can see how my edges improved as I went along.  They REALLY SUCK the the top.  It is much easier to work over the extra layer of fabric where the applique is, than to stitch free form without the added stiffness of the applique.

Lesson #4
Finishing the garment is going to take time, and I have to account for that.  I imagine that what I want to make will be mostly tailored things, vests, jackets, coats...  And everything will need linings.  I am an adequate tailor, and hopefully my skills will be sufficient to the task.  


Lesson #5
There has to be a way to clean these garments I want to make.  I purposefully chose beads with various finishes from various manufacturers.  And I will send the thing to the dry cleaner and see what happens.  Eek.  That will be a grand lesson.  I know Miyuki has a list of beads they consider to be colorfast.  I imagine Toho does too.  No idea about Matsuno.  We shall see.  This was the thing that was maybe the most frightening to me, but the stores are full of fall and winter party dresses. Many of them have beadwork, with beads that look less permanently attached and of lower quality than mine. 

Lesson #6
 I need to think about closure as part of the design.  I have some awesome Chinese frogs I thought would close this garment, but nope, WAY too busy.  I ordered gold snaps.  FROM TURKEY!!! Because that is where I could find nice brass snaps.  Really?  Really!  So the closure will have to wait a bit.  But I think I am ready to do some sketching for a second effort.  

Monday, September 8, 2014

The Giving Tree


My son is poised on the edge of leaving home for real. He will graduate from college this Spring, and has a great job waiting for him.  I asked him to clean out his bedroom before he moved to his apartment this fall, so it could be used as a guest room.  I meant, just to get all the stuff off the floor and off the surfaces, but he accomplished a major purge, including the last of his childhood books. He put them in the hallway, for me to give away.  Any locals looking for great junior high/ high school reading for their children?  We have purged books many times in his almost 22 years, so only the most recent are still in residence.


Looking at these books (in addition to making me feel a little sad and nostalgic!) reminded me that the Etsy Beadweavers September Challenge theme is "Your Favorite Children's Book."  There were so MANY! I read to him literally from birth. How could I choose a favorite??

I thought words from a favorite book might provide great inspiration, so I googled quotes from Children's books and happened on this article.  The first quote was from Shel Silverstein's "The Giving Tree".

"I wish that I could give you something... but I have nothing left.  I am an old stump.  I am sorry..."

Goodness!!!  That was just how I felt!  He doesn't need me anymore.  Anything he wants, he can get for himself.  I don't see myself as an old stump... although I can appreciate how some parents might feel entirely drained by their children.  The quote continued...

"I don't need very much now," said the boy, "just a quiet place to sit and rest.  I am very tired."  "Well," said the tree, straightening herself up as much as she could.  "well, an old stump is good for sitting and resting.  Come boy, sit down.  Sit down and rest."  And the boy did.  And the tree was happy."

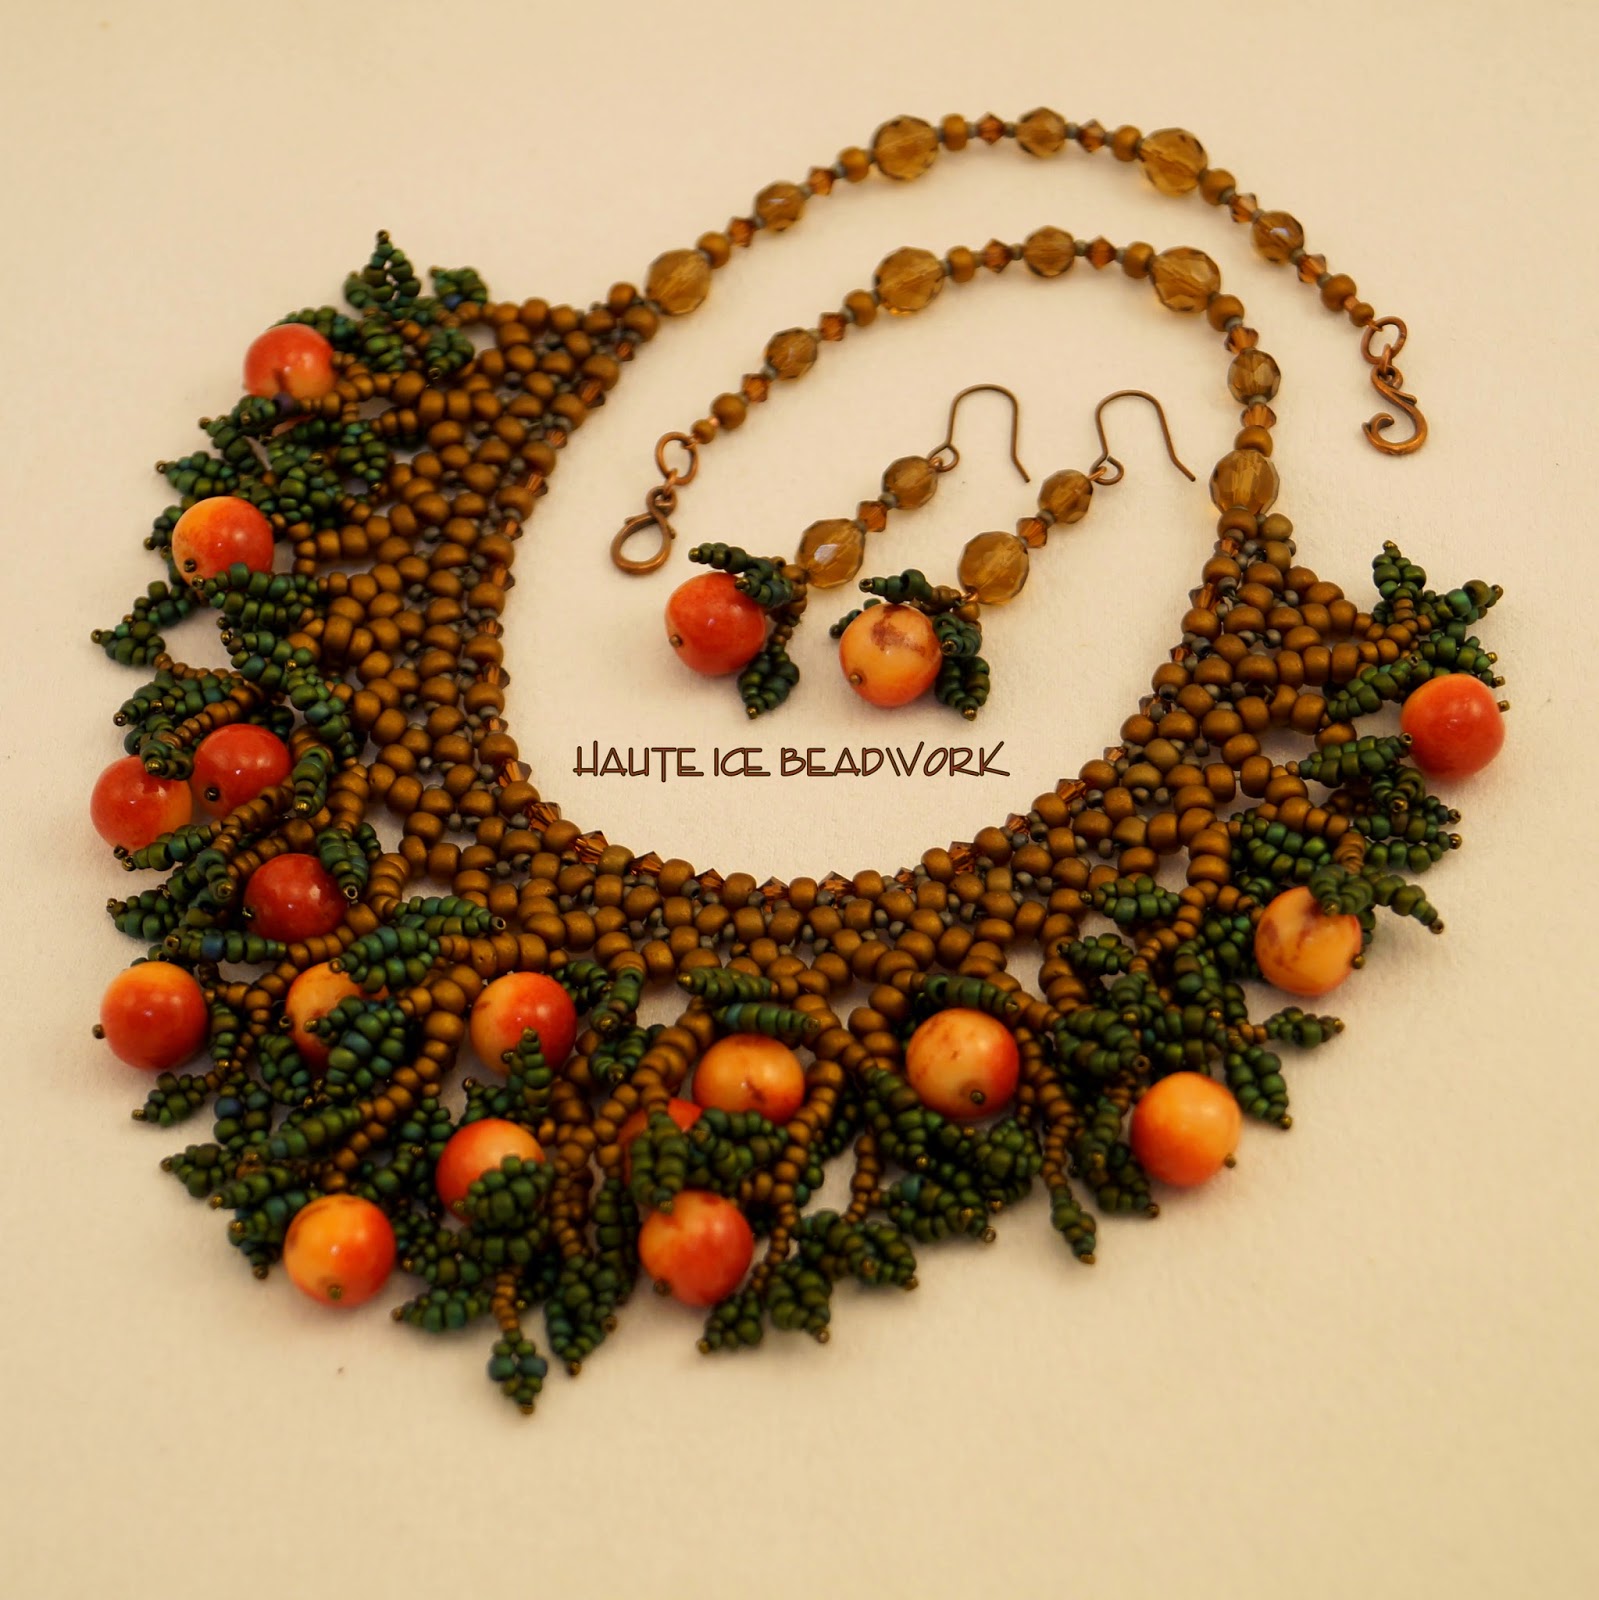
I got a copy of the book from the library, and although apparently it is a very controversial book, I loved it. I am made very happy by my sons simple presence in my life, and I am not an old stump.  I can still make apples!  Or at least, beaded apple necklaces.  I decided it was my perfectly timely, favorite children's book, and walked to an ancient neighborhood apple tree to do some research.


It was still happily bearing fruit, and I loved how the apples were partially hidden by the leaves.  I decided my work should be dense, and that the apples should have the coloring of these, some rosy red, some pale gold, with a few scars and dark bits.  I found some great ones on Etsy, ordered them, and set to work on a yoke, to support my leafy fringe.  When the apples arrived, I wove them into a pretty harvest-time apple tree.


And then I made a pair of earrings, while I was cleaning up.


Most amazingly, the piece sold within hours of my listing it!  So THANK YOU, Etsy Beadweavers for the inspiration and the deadline.  I have reaped much benefit from my many years of membership.  If you are an Etsy seller of beadweaving, you can join at the link.  I liked my necklace so much, I made myself another, with my leftover apples!  Just to remind myself of the joys of my particular child, and how very intact and productive I feel as a person and artist.

Monday, September 1, 2014

Swarovski #4627 Octagon Fancy Jewel Bezel

I got such a cool e-mail!  I am going to share it, but remove the name to protect the innocent.

"Hi Marsha,
My name is X and I was reading your blog post about square beaded bezels.  Your tutorial is the most thorough I have come across!  I consider myself to be a fairly competent beader, but the beaded bezel technique including corners has completely eluded me!  Before I attempt this for the seventh time, I have a question for you...  I am trying this technique on a 27mm Swarovski Fancy Octagon.  I assume this technique would be the same for rectangular shapes, but the bead count would be more on the longer sides.  For the corners, once I have skipped a bead on the first round of creating the corner, would I skip it again on the next round of peyote stitch? Or do I just skip each corner once, then proceed as usual on the following rounds?  I hope that I am trying to describe makes sense.  :)  I am currently building a bit of a bead embroidery collection and it simply would not be complete with out bezelled cabochons of varying shapes!
Thanks so much for your blog posts.  Your beadwork is exquisite!
-X"

This felt like such a fun challenge to me that I raced out to my local bead shop yesterday and picked out one of the jewels.  It's a Swarovski "Fancy Jewel" #4627, 27x18mm.
I got it out this morning while water boiled for my coffee, and gave it a go.  I did it initially in silver delicas, with silver 15/0 rounds as needed.  I felt that the angles were too small to to skip a bead, which results in a 90 degree corner, so I just replaced the eight corners with 15/0 seeds, along the facets. I did do some decreases on the last row of the face. I thought it worked well, and after finishing the face, I realized it would be hard to see here in a picture, so I did it again in black and silver, to take pictures.  Then I looked at my clock and realized it was 9:30 and I had not ever made that coffee!  Time FLIES when you are having fun!

Here is the thinking I used.  I am sure there are other ways to do this, but, you can follow along if you like!

I strung a few cylinder (using delicas in the first effort and Aikos in the second, both work fine) beads and took a look at how many each side of the jewel would require.

The two short sides, top and bottom - 8 beads each x 2 = 16 beads
The two long sides, 14 beads each x 2 = 28 beads
The four diagonal corners, 4 beads each x 4 = 16 beads
16+28+16=60  So...

Rows 1 and 2 - I strung 60 beads on about 2 yards of fireline, and stitched through the first bead again, in the same direction.  I left about a 12 inch tail, which I used later.
Row 3 - I worked one row in peyote stitch, holding the work FLAT on my hand,so the outside row was larger than the inside one, trying to create the basic shape of the jewel, without any structural stitching, just thinking and shaping.
Then I stepped up into the inside of the oval shape.
Row 4 - Peyote stitch 6 11/0 cylinder beads , 1 15/0 seed. 1 cylinder, 1 15/0 seed, 3 cylinders, 1 15/0 seed, one cylinder, 1 15/0 seed, 6 cylinders, 1 15/0 seed, one cylinder, 1 15/0 seed, 3 cylinders, 1 15/0 seed, one cylinder, 1 15/0 seed, and step up into the next round.  (That is the pattern, but I don't work it in that order.  I started in the middle of a 6 cylinder side. When I do geometrically shaped bezels, I like to start in the middle of a long straight side, because starting at or near a corner is just too difficult and confusing.  I think it is easier to understand the pattern if it is written this way though. so in the picture, I am in the middle of the long side when I step up.)
See the eight 15/0 beads, and how they begin to create the shape?  My fingers and tension help this along.

Row 5 - Peyote stitch 7 11/0 cylinder beads, 2 15/0 seeds, 4 cylinders, 2 seeds, 7 cylinders, 2 seeds, 4 cylinders, 2 seeds, and step up in to the new round.
Row 6 - Switch to all 15/0 seeds and stitch 6, (I used black but they could have been silver) take one stitch without adding a bead, and add the one 15/0 seed corner bead, followed by a stitch with no bead.  Then stitch 3 15/0 seeds, one stitch with no bead, 1 15/0 seed and one stitch with no bead.  Repeat the 6 15/0 seeds, one skip, one seed, one skip and 3 15/0 seed, and the face is done and fits our shape nicely!  Has kind of a cool deco shape too.  Which I got all excited about and decided to finish a necklace with my little victory!

Row 7 - I stepped up through the bezel to the outside of the work, and switched to the tail thread. Then I loosely stitched a row of peyote with the cylinder beads. all the way around the bezel, holding the stone in place.  I needed to leave a little space at the outside corners between beads.  (It might have been possible to add a 15/0 seed at each corner, to be treated as a single bead in the next round, but I did not do that.)
Row 8 - I stepped up again and stitched a second row in peyote, this one more snug, beginning to hold the shape in place.  You must pay attention to having the stone positioned in the center as you work, and tighten carefully to keep things aligned properly.
Rows 9 and 10 - Turn the original thread and stitch two rounds of 15/0 seed beads.  SO here is a lesson.  When a shape does not have 90 degree corners, you could probably get away with just making the essence of an oval bezel. like I did to finish the back. but I really like my shaped front.

Then I got all crazy and spent the rest of the day adding to the top and bottom of the bezel to create a Hexagon, adding a drop and bail and beading a rope. Because I liked it, and I had a free day!!!

I continued with the Deco feeling of the bezel, and used up a cool little cone I got in my goodie bag from Swarovski at "Meet the Teachers" in Wisconsin at the Bead and Button show.  There were loads of pretty awesome things in that bag, but this one I have been trying to use for months!  For those of you who know me, I do not plan to sell this piece.  I consider it an experiment.  I want to see how the backside of the jewel wears, (since I did not completely cover it) and I want to see how permanent the "Permanent Finish" is on those silver beads. 


I liked working fast and crazy for a day, and want to thank my reader that a fabulous time!!!  

Monday, August 11, 2014

North Shore Nocturne

Most of our family vacations have been visits to my (or Carl's) parents.  So we had never been to the North Shore of Lake Superior, a very Minnesotan summer get-away destination.  For my birthday this year, we went for the first time, and I found it inspiring!  While strolling the beach in Grand Marais, I noticed many very flat rocks, and a young man, skipping them across the water.  I picked up one that was a nearly flawless oval, with a Payne's Gray color I loved.  I stuck it in my pocket and thought it might be interesting to bead.


The lake is breathtaking, crystal clear, and constantly changing with light and clouds. This cloud rolled down the shore, completely hiding from view the little jut of land and trees while I watched.  


There was often a mist, creating brilliant rainbow effects,
especially at the many waterfalls, where we hiked early each morning.


My favorite images were the high-contrast, silhouetted ones, with light angled low, at dusk or dawn.


When we got back home, I found the pebble in my pocket. I scrubbed my treasure and rubbed it with beeswax, polishing it to a lovely matte luster. I decided to try to re-create the waterfalls, and the beautiful silhouette lighting I found so appealing.  I called my results "North Shore Nocture".


I tried to include the mistiness and the bits of rainbow, and the beautiful natural world.  My friend Kinga sent me some cabochons for my birthday, and this shadowy leaf one seemed to belong to the piece.


We heard owls hooting, but never saw one, so the bail represents their unseen presence.  


I am really pleased with the rope!  I made a chenille rope, but it did not seem substantial enough for the work, and stretched to support the work, it felt bumpy and imperfect. :(  I tried again, increasing the base row from what I originally learned (6 beads) to eight, to accomodate a core of purchased commercial satin wrapped neckstrap, with ends already attached.  Here's a pic from the work table of the icky original chenille rope, (which does not look so bad until stretched to hold the weight of the waterfall) and the new one and its ends. Learned something really cool there, and it brings up some fabulous other ideas!


And because you know I like to be proud of the OTHER side of my work, a parting shot...
   

Oh, and one more thing.  Regina Krawets recently posted a beautiful piece of body jewelry on facebook and said she thought it was her "go-to" style.  I wondered what mine was. 
I think since I began as a beadweaver, and love work that is entirely woven, (although I do bead embroidery too) this might be my "go to" beady self.  A weaver.  Maybe this is why I love this gal's work.....