Search This Blog

Monday, September 8, 2014

The Giving Tree


My son is poised on the edge of leaving home for real. He will graduate from college this Spring, and has a great job waiting for him.  I asked him to clean out his bedroom before he moved to his apartment this fall, so it could be used as a guest room.  I meant, just to get all the stuff off the floor and off the surfaces, but he accomplished a major purge, including the last of his childhood books. He put them in the hallway, for me to give away.  Any locals looking for great junior high/ high school reading for their children?  We have purged books many times in his almost 22 years, so only the most recent are still in residence.


Looking at these books (in addition to making me feel a little sad and nostalgic!) reminded me that the Etsy Beadweavers September Challenge theme is "Your Favorite Children's Book."  There were so MANY! I read to him literally from birth. How could I choose a favorite??

I thought words from a favorite book might provide great inspiration, so I googled quotes from Children's books and happened on this article.  The first quote was from Shel Silverstein's "The Giving Tree".

"I wish that I could give you something... but I have nothing left.  I am an old stump.  I am sorry..."

Goodness!!!  That was just how I felt!  He doesn't need me anymore.  Anything he wants, he can get for himself.  I don't see myself as an old stump... although I can appreciate how some parents might feel entirely drained by their children.  The quote continued...

"I don't need very much now," said the boy, "just a quiet place to sit and rest.  I am very tired."  "Well," said the tree, straightening herself up as much as she could.  "well, an old stump is good for sitting and resting.  Come boy, sit down.  Sit down and rest."  And the boy did.  And the tree was happy."

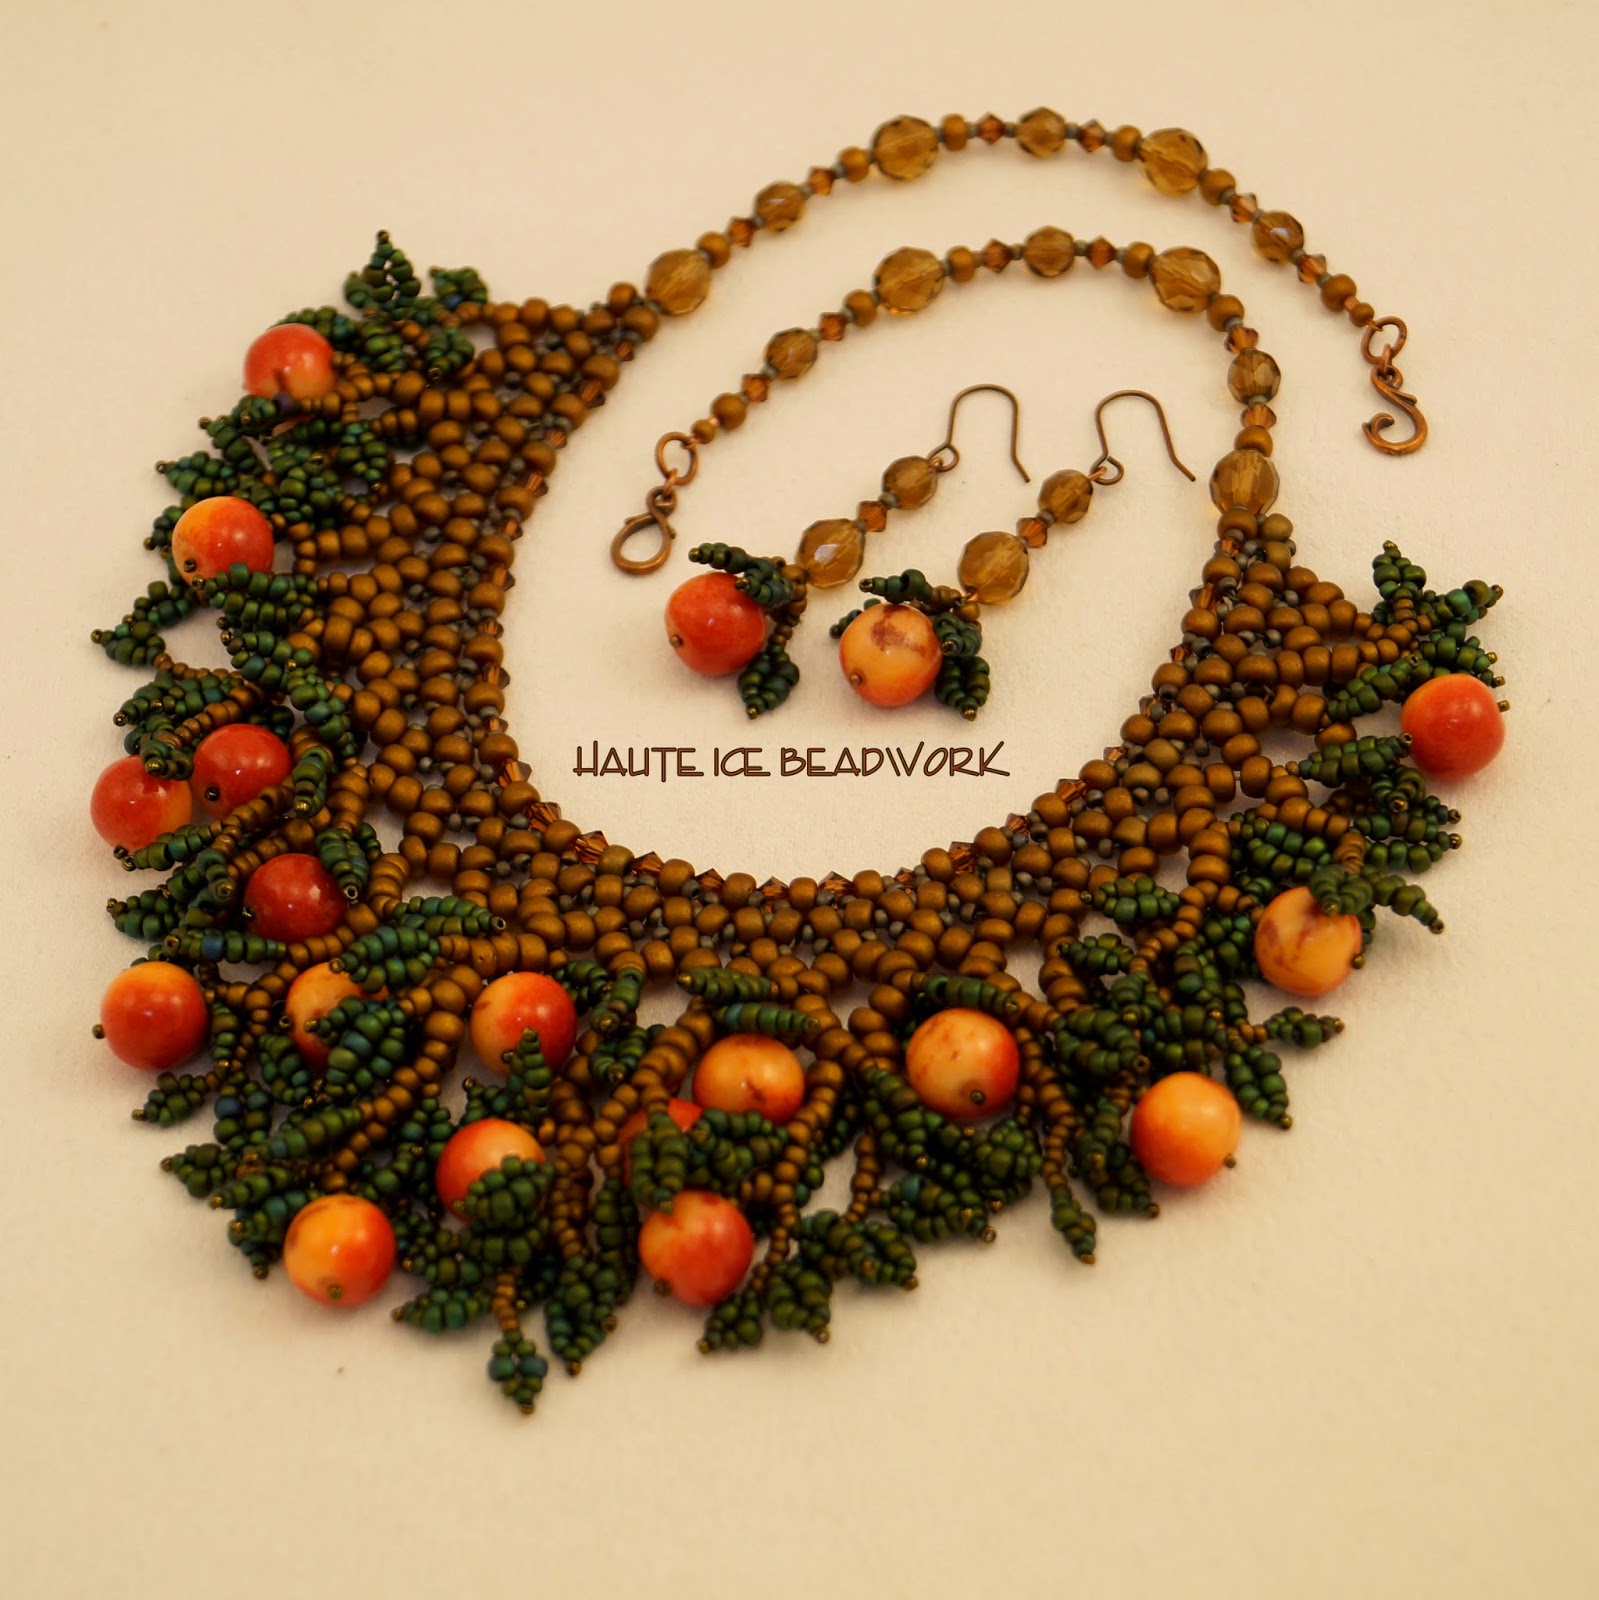
I got a copy of the book from the library, and although apparently it is a very controversial book, I loved it. I am made very happy by my sons simple presence in my life, and I am not an old stump.  I can still make apples!  Or at least, beaded apple necklaces.  I decided it was my perfectly timely, favorite children's book, and walked to an ancient neighborhood apple tree to do some research.


It was still happily bearing fruit, and I loved how the apples were partially hidden by the leaves.  I decided my work should be dense, and that the apples should have the coloring of these, some rosy red, some pale gold, with a few scars and dark bits.  I found some great ones on Etsy, ordered them, and set to work on a yoke, to support my leafy fringe.  When the apples arrived, I wove them into a pretty harvest-time apple tree.


And then I made a pair of earrings, while I was cleaning up.


Most amazingly, the piece sold within hours of my listing it!  So THANK YOU, Etsy Beadweavers for the inspiration and the deadline.  I have reaped much benefit from my many years of membership.  If you are an Etsy seller of beadweaving, you can join at the link.  I liked my necklace so much, I made myself another, with my leftover apples!  Just to remind myself of the joys of my particular child, and how very intact and productive I feel as a person and artist.

Monday, September 1, 2014

Swarovski #4627 Octagon Fancy Jewel Bezel

I got such a cool e-mail!  I am going to share it, but remove the name to protect the innocent.

"Hi Marsha,
My name is X and I was reading your blog post about square beaded bezels.  Your tutorial is the most thorough I have come across!  I consider myself to be a fairly competent beader, but the beaded bezel technique including corners has completely eluded me!  Before I attempt this for the seventh time, I have a question for you...  I am trying this technique on a 27mm Swarovski Fancy Octagon.  I assume this technique would be the same for rectangular shapes, but the bead count would be more on the longer sides.  For the corners, once I have skipped a bead on the first round of creating the corner, would I skip it again on the next round of peyote stitch? Or do I just skip each corner once, then proceed as usual on the following rounds?  I hope that I am trying to describe makes sense.  :)  I am currently building a bit of a bead embroidery collection and it simply would not be complete with out bezelled cabochons of varying shapes!
Thanks so much for your blog posts.  Your beadwork is exquisite!
-X"

This felt like such a fun challenge to me that I raced out to my local bead shop yesterday and picked out one of the jewels.  It's a Swarovski "Fancy Jewel" #4627, 27x18mm.
I got it out this morning while water boiled for my coffee, and gave it a go.  I did it initially in silver delicas, with silver 15/0 rounds as needed.  I felt that the angles were too small to to skip a bead, which results in a 90 degree corner, so I just replaced the eight corners with 15/0 seeds, along the facets. I did do some decreases on the last row of the face. I thought it worked well, and after finishing the face, I realized it would be hard to see here in a picture, so I did it again in black and silver, to take pictures.  Then I looked at my clock and realized it was 9:30 and I had not ever made that coffee!  Time FLIES when you are having fun!

Here is the thinking I used.  I am sure there are other ways to do this, but, you can follow along if you like!

I strung a few cylinder (using delicas in the first effort and Aikos in the second, both work fine) beads and took a look at how many each side of the jewel would require.

The two short sides, top and bottom - 8 beads each x 2 = 16 beads
The two long sides, 14 beads each x 2 = 28 beads
The four diagonal corners, 4 beads each x 4 = 16 beads
16+28+16=60  So...

Rows 1 and 2 - I strung 60 beads on about 2 yards of fireline, and stitched through the first bead again, in the same direction.  I left about a 12 inch tail, which I used later.
Row 3 - I worked one row in peyote stitch, holding the work FLAT on my hand,so the outside row was larger than the inside one, trying to create the basic shape of the jewel, without any structural stitching, just thinking and shaping.
Then I stepped up into the inside of the oval shape.
Row 4 - Peyote stitch 6 11/0 cylinder beads , 1 15/0 seed. 1 cylinder, 1 15/0 seed, 3 cylinders, 1 15/0 seed, one cylinder, 1 15/0 seed, 6 cylinders, 1 15/0 seed, one cylinder, 1 15/0 seed, 3 cylinders, 1 15/0 seed, one cylinder, 1 15/0 seed, and step up into the next round.  (That is the pattern, but I don't work it in that order.  I started in the middle of a 6 cylinder side. When I do geometrically shaped bezels, I like to start in the middle of a long straight side, because starting at or near a corner is just too difficult and confusing.  I think it is easier to understand the pattern if it is written this way though. so in the picture, I am in the middle of the long side when I step up.)
See the eight 15/0 beads, and how they begin to create the shape?  My fingers and tension help this along.

Row 5 - Peyote stitch 7 11/0 cylinder beads, 2 15/0 seeds, 4 cylinders, 2 seeds, 7 cylinders, 2 seeds, 4 cylinders, 2 seeds, and step up in to the new round.
Row 6 - Switch to all 15/0 seeds and stitch 6, (I used black but they could have been silver) take one stitch without adding a bead, and add the one 15/0 seed corner bead, followed by a stitch with no bead.  Then stitch 3 15/0 seeds, one stitch with no bead, 1 15/0 seed and one stitch with no bead.  Repeat the 6 15/0 seeds, one skip, one seed, one skip and 3 15/0 seed, and the face is done and fits our shape nicely!  Has kind of a cool deco shape too.  Which I got all excited about and decided to finish a necklace with my little victory!

Row 7 - I stepped up through the bezel to the outside of the work, and switched to the tail thread. Then I loosely stitched a row of peyote with the cylinder beads. all the way around the bezel, holding the stone in place.  I needed to leave a little space at the outside corners between beads.  (It might have been possible to add a 15/0 seed at each corner, to be treated as a single bead in the next round, but I did not do that.)
Row 8 - I stepped up again and stitched a second row in peyote, this one more snug, beginning to hold the shape in place.  You must pay attention to having the stone positioned in the center as you work, and tighten carefully to keep things aligned properly.
Rows 9 and 10 - Turn the original thread and stitch two rounds of 15/0 seed beads.  SO here is a lesson.  When a shape does not have 90 degree corners, you could probably get away with just making the essence of an oval bezel. like I did to finish the back. but I really like my shaped front.

Then I got all crazy and spent the rest of the day adding to the top and bottom of the bezel to create a Hexagon, adding a drop and bail and beading a rope. Because I liked it, and I had a free day!!!

I continued with the Deco feeling of the bezel, and used up a cool little cone I got in my goodie bag from Swarovski at "Meet the Teachers" in Wisconsin at the Bead and Button show.  There were loads of pretty awesome things in that bag, but this one I have been trying to use for months!  For those of you who know me, I do not plan to sell this piece.  I consider it an experiment.  I want to see how the backside of the jewel wears, (since I did not completely cover it) and I want to see how permanent the "Permanent Finish" is on those silver beads. 


I liked working fast and crazy for a day, and want to thank my reader that a fabulous time!!!  

Monday, August 11, 2014

North Shore Nocturne

Most of our family vacations have been visits to my (or Carl's) parents.  So we had never been to the North Shore of Lake Superior, a very Minnesotan summer get-away destination.  For my birthday this year, we went for the first time, and I found it inspiring!  While strolling the beach in Grand Marais, I noticed many very flat rocks, and a young man, skipping them across the water.  I picked up one that was a nearly flawless oval, with a Payne's Gray color I loved.  I stuck it in my pocket and thought it might be interesting to bead.


The lake is breathtaking, crystal clear, and constantly changing with light and clouds. This cloud rolled down the shore, completely hiding from view the little jut of land and trees while I watched.  


There was often a mist, creating brilliant rainbow effects,
especially at the many waterfalls, where we hiked early each morning.


My favorite images were the high-contrast, silhouetted ones, with light angled low, at dusk or dawn.


When we got back home, I found the pebble in my pocket. I scrubbed my treasure and rubbed it with beeswax, polishing it to a lovely matte luster. I decided to try to re-create the waterfalls, and the beautiful silhouette lighting I found so appealing.  I called my results "North Shore Nocture".


I tried to include the mistiness and the bits of rainbow, and the beautiful natural world.  My friend Kinga sent me some cabochons for my birthday, and this shadowy leaf one seemed to belong to the piece.


We heard owls hooting, but never saw one, so the bail represents their unseen presence.  


I am really pleased with the rope!  I made a chenille rope, but it did not seem substantial enough for the work, and stretched to support the work, it felt bumpy and imperfect. :(  I tried again, increasing the base row from what I originally learned (6 beads) to eight, to accomodate a core of purchased commercial satin wrapped neckstrap, with ends already attached.  Here's a pic from the work table of the icky original chenille rope, (which does not look so bad until stretched to hold the weight of the waterfall) and the new one and its ends. Learned something really cool there, and it brings up some fabulous other ideas!


And because you know I like to be proud of the OTHER side of my work, a parting shot...
   

Oh, and one more thing.  Regina Krawets recently posted a beautiful piece of body jewelry on facebook and said she thought it was her "go-to" style.  I wondered what mine was. 
I think since I began as a beadweaver, and love work that is entirely woven, (although I do bead embroidery too) this might be my "go to" beady self.  A weaver.  Maybe this is why I love this gal's work.....


Thursday, July 17, 2014

Zoya Gutina's Fashion Colorworks Contest Dazzles!

Time to come clean.  I have considered entering Zoya Gutina's Fashion Colorworks Contest in the past and it has always looked like a substantial challenge!  This year, I was asked to serve as a judge, and I have nothing but praise for all those plucky beaders who took the challenge.

Contestants are given three groups of the year's top ten colors, as described by Pantone.  Using those color groups, participants may create work in three categories, Seed Bead Jewelry, Finished Jewelry, and Seed Bead Objects.  You can check out the rules and the three color groups here.

Judges are asked to rank entries on five different criteria:  We are given photos of each entry, (an overall shot, and closeups, no models, props, or names allowed) and judge each one with a numeric score between 1 and 10 for each of the criteria, which are:

     1) Use of color.
     2) Composition, originality
     3) Use of techniques
     4) Use of materials
     5) Overall Impression

This is a similar system to what I use myself when judging beadwork, and I find the results very fair.  It does not require comparing apples to oranges, or one style to another, just looking really closely at design elements, and ranking their use.  We rank twice, once to determine finalists, and again for each finalist entry to select winners.  The public is also given an opportunity to rank the finalists, which I think engages observers beautifully in the process.  Another wonderful thing about this contest is that there are MANY winners, both chosen by the judges and public ranking, and by various sponsors, and the prizes for this event are wonderful!

I had some favorites, among the finalists, and was pleased when Zoya asked for commentary.  My thoughts were presented in her fabulous monthly newsletter, along with those of the other judges, and I would like to share them here as well.  There are links to each piece, and if you have not seen these beauties, I hope you will take the time to look at my personal favorites, and enjoy them as much as I did!

I appreciate the words below are small and pale, and you can more easily see them in Zoya's monthly newsletter, (just scroll down below the list of winners) but I will put them here too, just because I really want to honor these brave beaders and their wonderful results in the 2014 Fashion Colorworks Contest!


Beaded Jewelry
In the Beaded Jewelry category, my favorite in the Radiant Orchid colorway was a lovely floral freeform wreath necklace, with a vast array of flower and leaf shapes. The Summer Necklace components were organized like a beautiful bouquet, keeping each hue cleanly visible, in harmonious relationships, and accented perfectly with spare use of the Sand hue. Many petals showed ombre color shifts, creating depth, and inviting the eye into the flowers.
Mirror Danu Necklace, in the Placid Blue group, showed fantastically delicate details, especially in the re-embroidered yoke. The Freesia made a perfect accent in the beaded beads and connections to the maze-like focal piece. Subtle value use throughout the work provided highlights and shadows to make the piece feel organic and alive. It is rich, luscious, and a little mysterious.
Lullaby Necklace was my favorite in the section, and a beautiful interpretation of the mood of the Dazzling Blue colorway. All the shapes in this piece were soothing and comforting, relating gently to each other. I felt wrapped in the lines, like the sweet face cab. Perfectly placed star accents twinkled, and gently gradating pearls lead my eye to the delicate fringe, long enough to have a soothing pendulum sway with a wearer's movement. The work had sympathetic negative spaces, beautifully placed component connections, and technical perfection as well, thanks to clean, flat edges and neat, concise embroidery. I wanted to climb in to this piece, listen to the song, and be rocked to sleep.
Finished Jewelry
In the Finished Jewelry category I was blown away by the soutache work in Aurora Necklace. Symmetry is difficult to accomplish, and the shapes, both positive and negative, in this work are astonishingly precise. Not only are the shapes perfect, they are beautiful, and the subtle texture stitched in Sand between the Orchid layers gives a laced-together look I loved. The added dimension of the top layer with its elegant pearly accents and round shapes is a terrific foil for the points in the under layer, and the clasp ties the layers neatly together. Extraordinary work.
The Song of Siren Set featured loads of texture in the weaving, with great color blending that avoided muddiness with careful placement that added depth to the structures. The repetition of shapes with subtle differences was beautifully done, and the addition of the fringy bits and larger beads at both ends of the work holds the different pieces together, and creates a lovely whole.
I have to honor another work in the Placid Blue colorway in this category as well.Careless Fisherman Ankh-Morpork Set has expertly selected details and great story-telling. The metal trinkets in the embroidery and throughout the work are used with great sensitivity to scale and proportion, and I liked the use of the chain as yoke and drape, adding to the picture without over powering the delicate embroidery. I think in a parure, each piece should stand on its own and combine effortlessly, and I especially like the bracelet/earrings combination.
Beaded Objects and Accessories
Flight of Fancy Handbag is a great example of color control in the face of lush texture; in my opinion, a challenge of the highest degree. I loved the divisions of hue, the related components used differently in each color context, and the rich dimensional beadwoven components. I also loved the variety of different materials, stitches, and skills presented.
The Yellow Submarine Set was a delight! The whimsy of the beaded rivets and cabochon portholes, in conjunction with the realistic ocean detritus and undersea life imagery was well-balanced, and the disparate elements sang together perfectly. The ocean bit looked like cake decoration, and the artist used a varied and rich selection of tips for her bead "pastry bag", creating textures that made me laugh out loud. The inclusion of a key chain in the set was inspired!
The delicate work in the Twilight Flowers Set had for me the quality of a colorized black and white film. The color in the flowers and doily-like cabochon edges sprang visually ahead of the steely grays, demanding attention. It would be a feminine and elegant addition to a little black (or Paloma!) dress.

Sunday, July 6, 2014

For My Friend

This work is a gift for a friend on the occasion of her 70th birthday.  Last year, for my 60th, she honored me with a generous gift certificate to one of my favorite local bead shops.  I wanted to return the favor.

My friend is intelligent, a voracious reader, and loves opera.  She is a mother to feline fur children, currently, a tabby named Holly. She plays bridge, and is a loyal companion.  She owned a cabin in Wisconsin, and that was the part of her that spoke to me, in this design.  Oh, and have I mentioned, she is a private person, and I respect that.  No names.


I wanted to return to my roots, and produce an entirely woven piece for her, and chose this jasper because it feels like a Wintery Wisconsin woods sunset to me.  It is either Cherry (sometimes called Red) Creek Jasper, or maybe Picasso Jasper. I have had it a long time, and do not remember where I bought it.  It has a nice polish, and because of this, I am going to guess, Utah Picasso.  I am fairly sure some of the supporting beads are Cherry Creek from China, judging both by their matte finish, and the not quite perfect drilling that China seems to be famous for.  I chose this stone, both because of its outdoor imagery, and because the beautiful silvery gray in the stone is very close to the color of my friend's hair.


Since as we age, dexterity dimishes, I wanted to make the work easy to wear, and especially, because my friend lives alone, with no one to fasten a lobster claw for her.  I used  hidden magnets to close the back of the necklace.


I created a delicate pair of earrings, as she is a small woman with delicate features.  The bracelet is also closed with a magnetic foldover clasp.


I had to ask her for a wrist measurement, since the oval beads will not lay flat unless the bracelet fits snugly and even though she has said "no gifts" she did oblige me.  I am sure she knows what I am up to, but I hope she will accept my gift in the same way I accepted hers; as an act of love, support, and celebration of life well-lived.  Happy Birthday!

Saturday, June 7, 2014

A Little Flower for You!

I am so honored that so many of you read my blog, that I want to offer up a little gift to you all. I am also celebrating my second place ribbon in the Ms. Maddie's Fabulous Florals category at the Bead Dreams competition.   Last year I posted a square bezel tutorial, and this year, I think I will give my readers a little flower component, in honor of  Merle Berelowitz.  This is an almost-no-strings-attached gift, although if you are planning to teach this component or sell it, I would really appreciate design credit.  If you give me credit for the design, I give you my permission to use this component as you like!

You will be making a 5 petal flower, so how sensible to begin with a base of five beads!  We will be using primarily circular flat peyote stitch and the beginning part of square stitch to create this component.

On a wingspan of thread, coated with a sticky conditioner like beeswax or microcrystalline wax, pick up 5 15/0 seed beads and sew through all five again to form a ring, leaving an 8" tail.  Don't tie a knot.
Now, stitch in circular flat peyote, one round of 15/0 seed beads, one between each of the original beads, and step up into the new round.
Next, stitch in circular flat peyote, one round of 11/0 seed beads, just like the last row and step up again.
Now, we want to cup the little base of the flower, so as we stitch the next round, we will wrap our generous tail around our little finger to allow us to pull its little bottom down.  We will add, using circular flat peyote, a row of 8/0 seed beads, pinching as we stitch to help the little cup form.  This is where the sticky thread conditioning helps, and you can add more at any point if your thread becomes slippery.
And then, after the step up, add a second row of 8/0 seeds, and step up a final time, continuing to help the work form and maintain a cup shape.  Now our base is finished and it is time to work the five petals, one off each of the five up beads.
To make the first petal, begin by adding three 11/0 seed beads, in a picot or sorts to the 8/0 you just exited, using square stitch, by stitching through the 8/0 again, in the same direction.  That is the essence of square stitch. In the real stitch, we would link this square to others with common side beads, but here, we use only the first portion of the stitch, without the connection.
Turn you work upside down, and we will work the rest of the petal from the back of the flower.  Add one of the 11/0 seeds and step into the first bead in the picot.  Then, square stitch a two bead picot on the bead your just entered.  I like to use a slightly different bead here, to make it easier to see what I am doing and to help create the illusion of depth.
Step into the next bead and add a two bead picot again and repeat the process on the third bead in the original picot. Keep your tension snug.
Now, add a final 11/0, the same bead as the original three bead picot, and pass through the 8/0 petal base bead again.
Now you have a three bead, inside cluster (the original picot), and an eight bead surround.  We are going to add one more row of square stitch picots, this time, using two beads in our eight bead surround row for each set of picots.  Go through two 11/0 beads in the outside row of eight, and pick up five 15/0 beads and sew through the two beads again, using square stitch.  The first set of two will be two different beads.
And here is the first five bead 15/0 picot in place.
Step into the next two beads, they will belong to two different picots, and pick up four 15/0 seed beads.  We will borrow the fifth bead from our picot from the original five bead picot.  Sew through the second set of two beads again, in square stitch, this time, the real deal and connected! (although traditional square uses only four beads)
Repeat this step two more times, with the remaining four beads in the outside row, picking up the fifth picot bead from its neighbor each time.  Here's the third set.
And the final set will have two different 11/0 beads, just like the first. After you apply the last five bead picot with square stitch, go through the 8/0 base again.  Your petal should look like the photo below.
In this last step of petal making, we will pull the petal into a little cup shape, like the base.  Pick up a 15/0, and go through the four beads standing up in the first picot.
Pick up another 15/0 and stitch through the three beads in the second picot.
Repeat this step twice more, going through the third three bead picot and the fourth four bead picot. Pick up a final 15/0 and stitch through the 8/0 base again.
Flip the work over, looking at the front of the flower and step ahead through the down 8/0 to and through the next 8/0 up bead.  This is the base for the second petal.  Now tighten the stitch, so the petal edges cup up, just like the base of the flower.
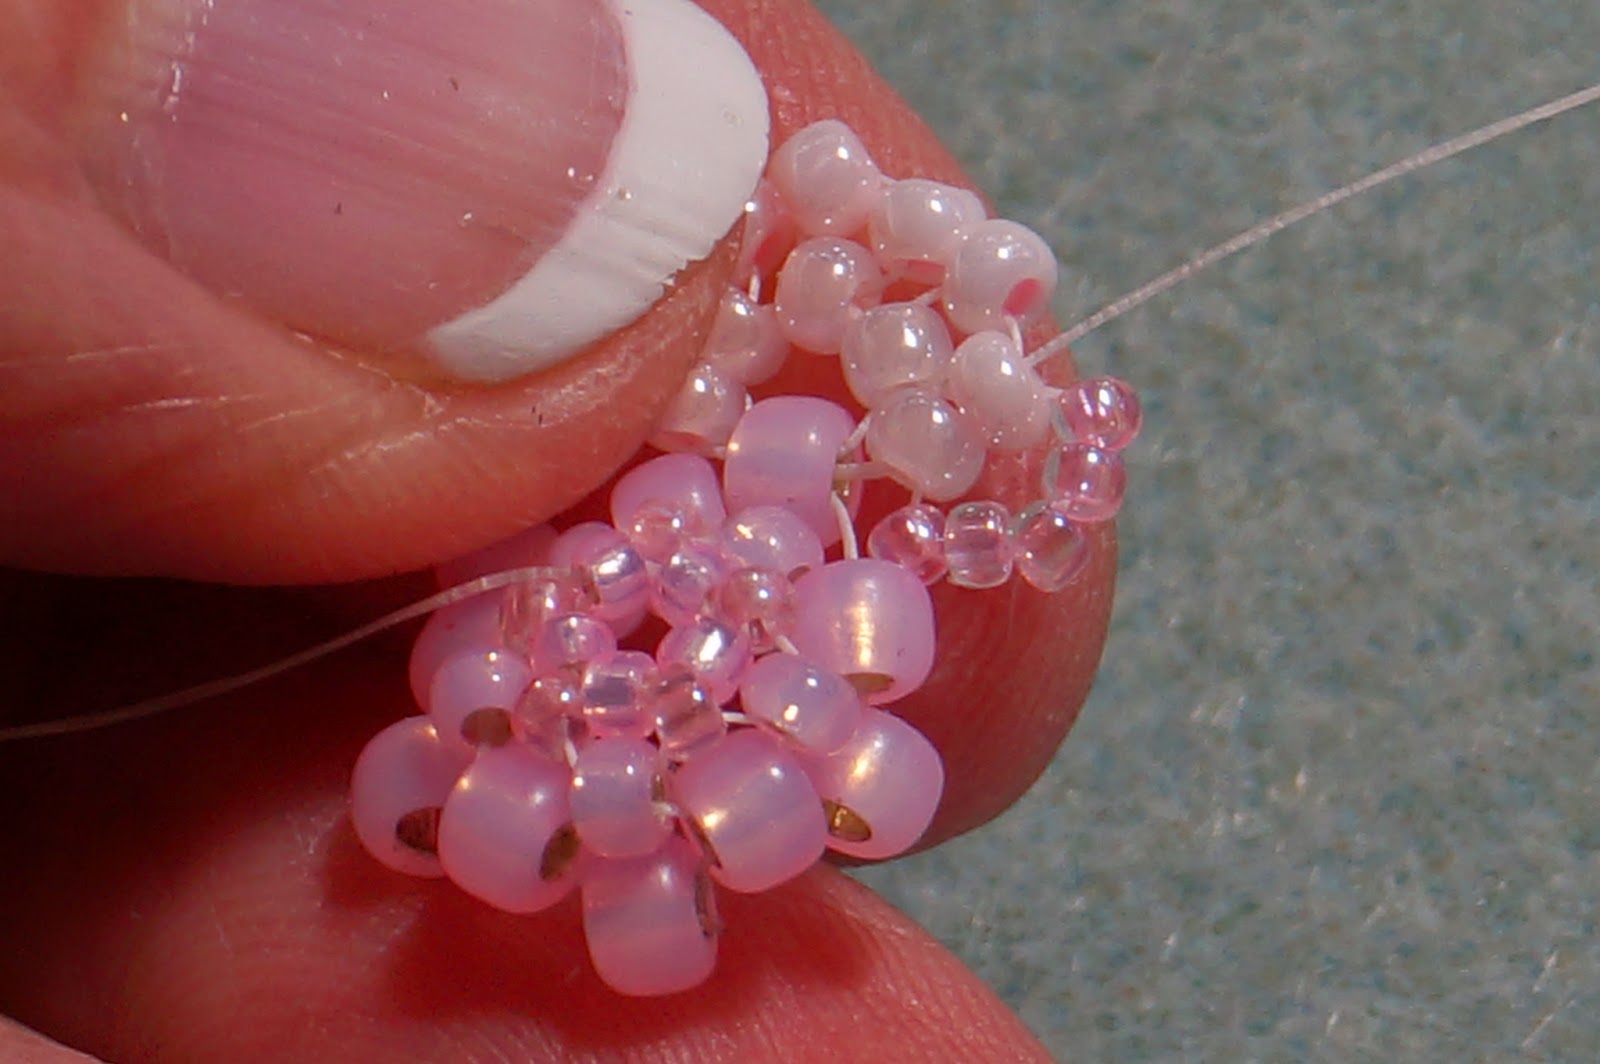
Add the first three bead picot to the base in the second petal, flip the work over and repeat the above petal process, until you have five petals complete. Here are two petals finished and a third, waiting to be flipped over, and pulled up into a cup.
 And here is our little five petal flower, finished!
And here is what the back view looks like.  You may weave in your threads to finish the flower, or use them to attach other parts to your flower, or to attach the flower to other things.
I added a pearl to the center of the flower, and rings to the back to create earrings, but the possibilities are endless.
Please, show me what you make with my five petal flower tutorial gift! 
I would love to see whatever you create on my facebook page
In a few weeks... or maybe a month... or maybe... well, EVENTUALLY...
  I'll show you what else I did with it.
Happy beading!  :o)