I recently read a post in Warren Feld's Jewelry Design Discussion Group on Facebook about doing commissioned custom design work. I responded, and then, instantly a prospective client contacted me, as if to test my response. I said I thought that successful custom work was all about communication, so, just for fun, here it is!
hello marsha
i would like to know if you ever create custom pieces, and if you might consider making a necklace for me. i have a very small piece of turquiose with a pre- drilled hole.
i would really love a piece of your artwork. it is absolutely beautiful! i would want something relatively small and simple and you could just incorporate the turquiose as your artistic ability sees fit.
thank you for your time. i hope to hear from you.
jennifer
Hello Jennifer,
I would certainly consider custom work for you. I would need to know if you have a time deadline, and if you have a price point in mind. I really appreciate the idea at you would just send me the turquoise and let me do with it whatever it tells me to do. :). I would also need to know the measurement of the base of your neck, and if you have a specific length in mind, let me know that as well. I am assuming that you want at least some bead weaving, since that is pretty much what I do.
Thank you so much for you interest in my work! How did you find me, if you don't mind my asking?
Marsha
(I have to admit, I was screening here. Part of doing effective custom design is having an appropriate client, and she was sounding good!)
thank you for getting back to me so quickly. i do not have a deadline of any kind. as far as price, if you were able to keep it under $150 that would be great. i do realize that there may be a custom order fee, so if you have to go a little above that then that would be ok.
yes, i would definitly want you to incorporate the turquoise into a bead woven piece. i love the beaded bezels, and started looking on etsy at bead weaving, thinking that it might suit the turquoise quite nicely. i find your art far superior to the others i've seen. your stitches are tight and uniform, and i love your expressive use of color. i feel as if you have a slightly modern take on a traditional art form.
i am out of town exhibiting at an art show. if you decide that this is indeed something you would be willing to do for me, i could send measurements next week.
thanks again for your consideration! jennifer
(I just loved it that the woman was an artist herself!!! It seemed a good sign. She has probably done custom work herself, and maybe has a sense of how challenging it can be, and I liked all her responses and her attitude. I decided to do the project, and was very curious about her piece of turquoise!)
Dear Jennifer,
I will be delighted take on your project. When ever you are ready to begin, send me your piece of turquoise. I will make a listing for you for a custom project and you will pay $75 down before I begin. Then I will list the finished item and you can pay the remaining $75 when I am ready to ship to you, plus the shipping cost, usually $5. I do not have an extra charge for custom work. I just try to keep track of time and spend an appropriate amount of time for the expected cost. I promise to finish before Christmas, and probably sooner than that, but I have a full time job in addition to beadwork, and am also in the process of some remodeling, so my life is a little crazy this fall.
Your artwork is very cool, and quite steampunk-ish. Should your turquoise piece include a gear or key, maybe, or do you have a feeling I should keep in mind when I work??
My address is:
Marsha Wiest-Hines
2201 Windsor Lake Drive
Minnetonka, MN 55305
Thank you! Marsha
(I assumed I would spend way, way too much time designing and wanted to have her be OK with the $150, so I proceeded as though that would be the cost. She was anxious to move ahead.)
yeah! i'm so excited.
i'd prefer it not look like steampunk. my art could probably be classified as such, although that was not my intent when i started about 4 or 5 years ago. I would rather it be more classic and timeless. I don't care for diagonal or zigzag lines. I have reddish-auburn hair, blue eyes, and fair skin. In clothing, i tend to stick with neutral colors. a lot of brown.
I am having trouble figuring length. the base of my neck measures about 15". I have an old rhinestone necklace. I put it on and will send a pic. the chain is 16.5" long. from the top of the focal stone to the bottom of the longest dangle is 2". I think the proportions look nice on me. I suppose it could go wider. it's up to you. whatever you think.
I will mail it on thurs or fri. whenever you create a listing, I will pay right away. if you need any more info, just let me know.
I can't wait to see what you and the little piece of turquoise "finger" out. I know it will be beautiful.
(I talk about "fingering things out" as I design in my shop statement. She had gone to the trouble to read what I had written. YAY! And the information she sent was terrific. Some of her requests popped out at me, and I have highlighted those. They are the things I considered first as I designed. I will keep her photo private, but it was a pretty simple piece and nicely proportioned. I decided it was a good thing she does not look at what I make for my dancers!!)

Hi Jennifer,
Pictures and measurements are always helpful and thank you for the personal info as well!

Hi Jennifer,
Pictures and measurements are always helpful and thank you for the personal info as well!
I was thinking to wait until I got the piece of turquoise to post the down payment listing, but I can do it now if that is your preference. I am not a steampunk queen, so while I think I could do it justice, I am just as glad that is not what you want. :)
I am really looking forward to seeing your stone and having it in my hands!
Thanks so much! Marsha
(I created the listing and she paid promptly. And a few days later, the turquoise arrived. She was not exaggerating when she said very small. It was rectangular, about 1/4" wide and just under 3/8" tall, and had a slightly off center hole drilled through it, near one end. One flat side had delicate carving. I WISH I had taken a shot of the turquoise before I made the necklace, but here's a closeup, as it sits in the finished piece.

(I decided to feature the carving, which alternately reminds me of an elephant or maybe those things in the Pacman game that gobbled dots. Maybe I should have asked about imagery and orientation, but I just liked the little carving and decided to feature it. I think it is really a decent piece of turquoise, from it's texture and color, and I immediately wanted to honor it with other good quality materials. And since she wanted a bezel, I needed a cabochon.)
I am really looking forward to seeing your stone and having it in my hands!
Thanks so much! Marsha
thank you. i have packaged the turquoise and will ship it today.
jennifer
Yay! Thank you! I am looking forward to working on your project. :)
Marsha
Marsha
i am too :)

(I decided to feature the carving, which alternately reminds me of an elephant or maybe those things in the Pacman game that gobbled dots. Maybe I should have asked about imagery and orientation, but I just liked the little carving and decided to feature it. I think it is really a decent piece of turquoise, from it's texture and color, and I immediately wanted to honor it with other good quality materials. And since she wanted a bezel, I needed a cabochon.)
i look forward to seeing it. thanks again.
jennifer
(She is so civilized and realistic. Feeling good about her really helps my ability to let go and let ideas flow. I think there is as much a knack to commissioning work as there is to designing for clients, and she rocks the process!!! Several days passed and after fiddling with several of shapes and colors from my stash of turquoise cabs, I chose and bezeled a teardrop of unstabilized Sleeping Beauty turquoise in Dark Gold 24k Miyuki delicas. They are the "brownest" of the precious metal- plated cylinders and I love them with turquoise. I thought the teardrop shape might look beautiful "wearing" the little rectangle piece as "jewelry" as I was imagining. I also liked the color of the unstabilized stone with the little chip, and thought they could happily share focus, in terms of hue, value and intensity.
Then I roughed out a wrap of tiny 2mm darker turquoise rounds for the cab, transitioning to some yummy Kingman mine bronze infused 4mm rounds, and fiddled for a long time, finally managing a double needle process that held the chip the way I wanted it to lie, and reasonably straight, given the off center hole. Although I was not completely satisfied with the result, I thought it was the right idea, and wanted to get client feedback before moving ahead. I did this as confidently as possible, while allowing her to say no if she was not happy.)
I have an idea roughed out and ready to finish, but I want do show you before I go any further. I believe the proportions are about the same as the rhinestone necklace you showed me. I hope I have featured your little chip, while providing it substance and a beautiful framework. My plan is to finish the yoke with the beads I have used thus far. This finished piece has a really nice Sleeping Beauty mine turquoise teardrop cabochon, and some of the beads are from the Kingman mine, with a bronze infusion. I think your piece is real and probably Sleeping Beauty in origin, but it wanted to cover both the good sources, so it could feel "at home" in its new situation. I do have bigger " Chinese turquoise" beads that I could use in the yoke, or I could embellish it, but I am inclined to keep it simple and let the focal be the star of the work.
Do you like toggle style clasps, or do you prefer a lobster claw style with an extender chain?
If you do not like this, or wish it were different in any way, please feel free to say so.
This is a terrible photo, taken with my iPad and the color is not very real. It is better in person. :)
Waiting to hear, Marsha
Oh, I meant to say as well, if I finish it as I have suggested, I think the final price would be $120.00. Just FYI. Marsha
Do you like toggle style clasps, or do you prefer a lobster claw style with an extender chain?
If you do not like this, or wish it were different in any way, please feel free to say so.
This is a terrible photo, taken with my iPad and the color is not very real. It is better in person. :)
Waiting to hear, Marsha
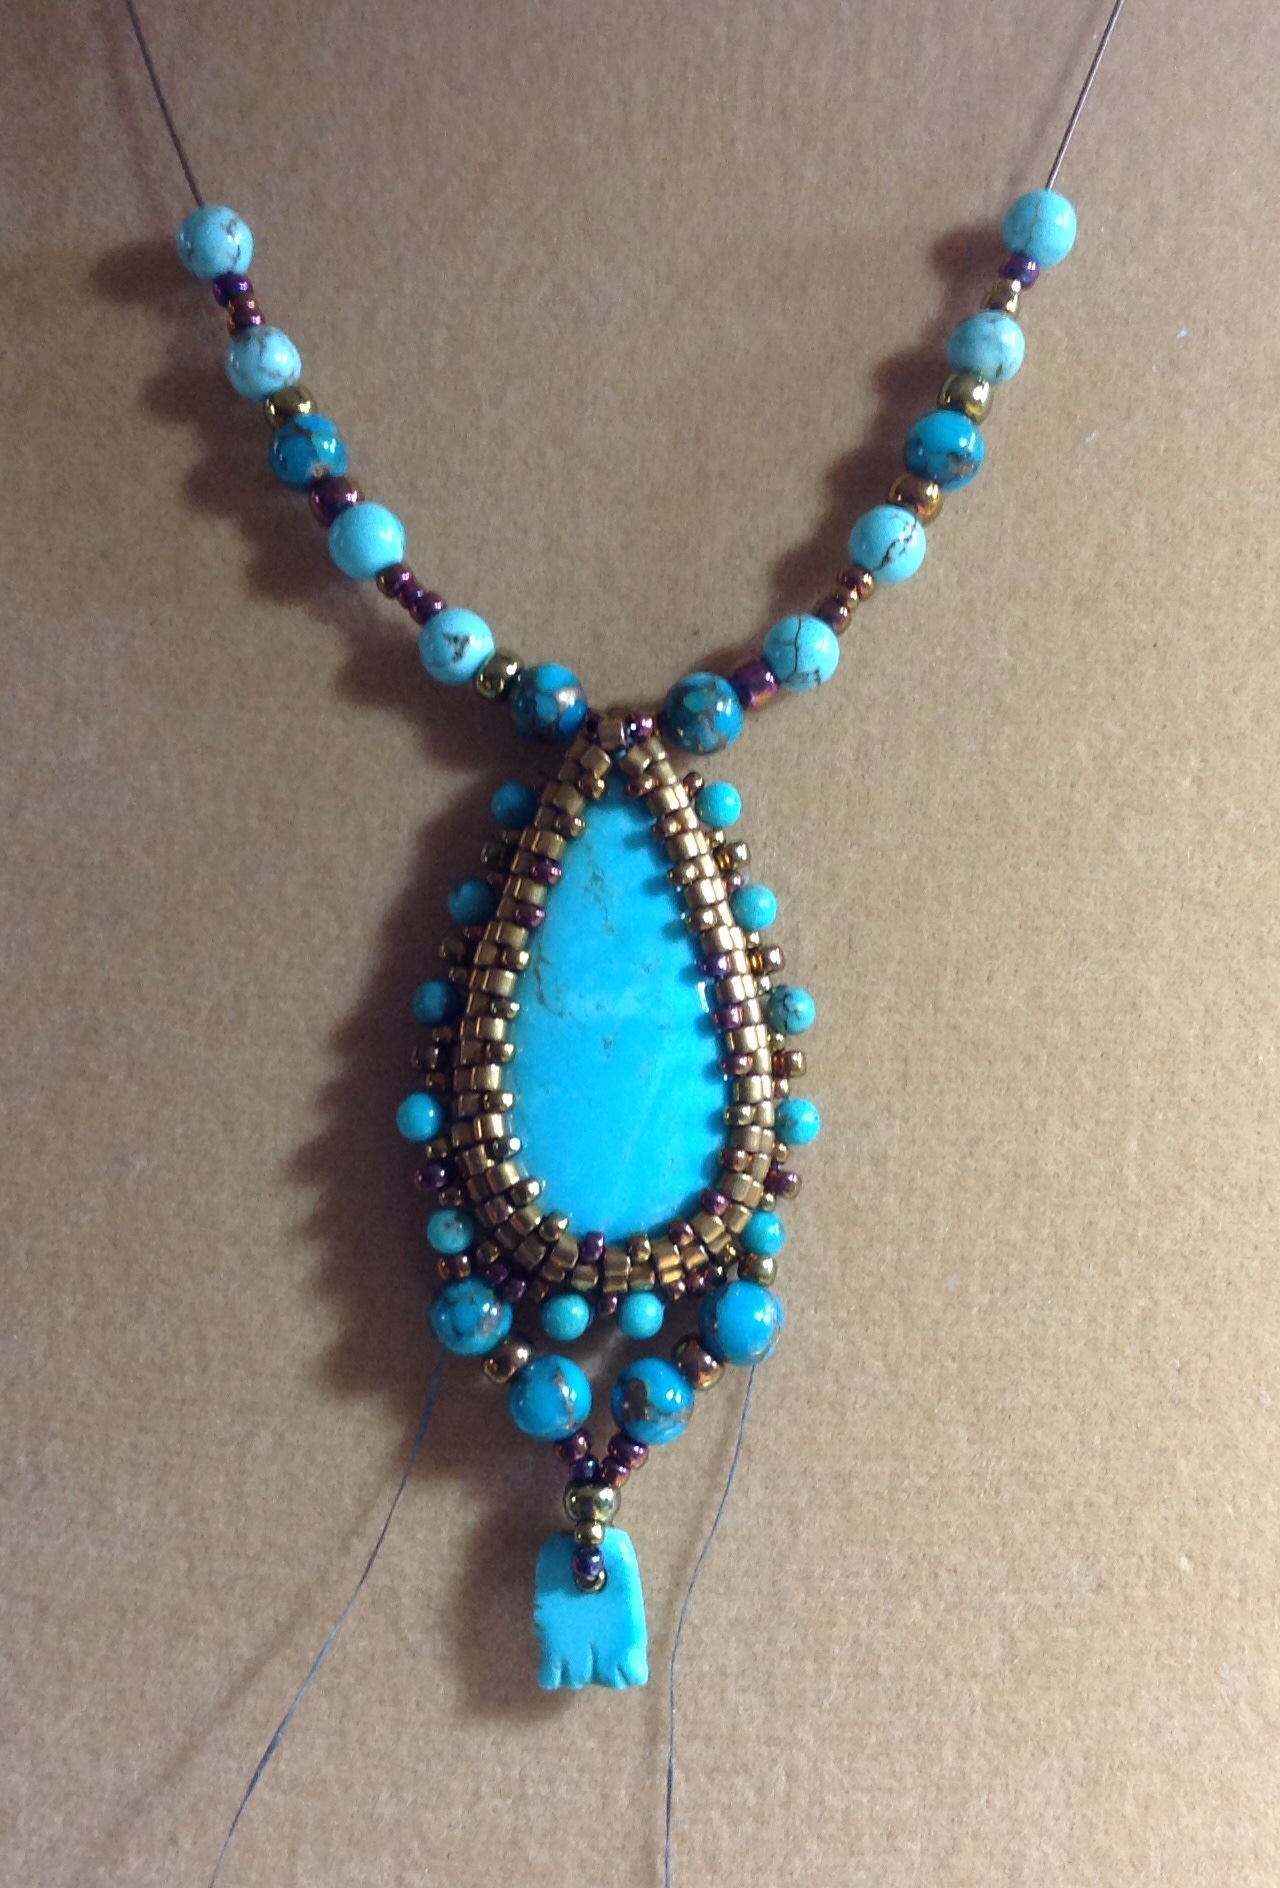
(It really was a terrible photo!!! And perhaps I should have done better, but I didn't. It is hard to understand scale from it. Luckily it worked...)
oh marsha, it's beautiful! just perfect! i love it, so go ahead and finish it like you planned. i think i would prefer a lobster clasp, if that will work ok with it.
do you take etsy gift cards? i was going to use one for part of the payment. i know i have to use direct checkout instead of paypal, but i didn't see that option the first time. no big deal if you don't.
thanks!
jennifer
do you take etsy gift cards? i was going to use one for part of the payment. i know i have to use direct checkout instead of paypal, but i didn't see that option the first time. no big deal if you don't.
thanks!
jennifer
I have to vend at a ballroom competition all day tomorrow. Lol, kind of like selling at an art fair, except with tons of makeup, false eyelashes and fake tans. You feel naked without mascara! So, much though I would love to finish it immediately, I will probably be ready to ship mid next week.
I take credit cards, debit cards, Etsy gift cards and paypal. Did you have trouble with checkout on any of those methods? If you do not mind, I would like to take good photos and list it in my shop, reserved just for you when I am done. I would also love to share it on fB and my blog, if that is ok. Once listed, you can pay when you are ready, and I will get it in the mail to you.
So glad I fingered out something you like!!
Marsha
hi marsha
my brain has been slowly clicking, and now i have a question, only if you haven't gone any farther........on the straight part, the yolk, i think, what if it was like it is now, but there were only 2 or 3 round turquoise beads on each side? then finished with the smaller beads that you have used, or something else a little smaller and more neutral. to my eye it would seem less formal. i want to feel comfortable with it so i can enjoy wearing it more often. if by chance you have already finished it, i do love it as is.
wow! you're good. you are correct about the origin of the piece i sent . it did come from the globe/superior, az area. as far as taking pics, yes, go right ahead. you can use them any way you wish. i would be honored to have it part of your blog. when you were talking about the square, blue ocean necklace, i found it very interesting that math came into play. (maybe that's why i don't bead) :)
let me know your thoughts on changing the necklace part. thanks!
jennifer
(Actually, the yoke was bothering me too. I was pretty convinced about the beads, but willing to put in more of the seeds between them. What I was offended by was the lighter color some of the turquoise beads I was using. I felt they were stealing focus from the cab and the carving. I also thought maybe she was just asking for simpler, since she mentioned, "less formal" and "comfortable." So I did two things. First I waited at least a day before I did anything. I know from my costume business that time to think is always a good thing.)
(Then I strung a strap without the high contrast annoyance of the lighter colored beads on one side and more of the brown beads, although I didn't eliminate the turquoise beads. I pinned on a simple chain on the other side after just a few of the beads, so she could say that was what she wanted, but with brown beads only. And I sent her to look at photos of some similar pieces that I think are very relaxed, and yet quietly elegant.)
So finally I am ready to show you a couple options. I would like you to go and take a look at a page on my blog. Scroll down to the jasper necklaces. They are strung with semi-precious beads like the Kingman turquoise I have used on your necklace, and I want you to see that the end result is really not especially formal.www.hauteicebeadworks.blogspot.com/p/2010-gallery.html
On the other hand, this is your necklace, and I want you to love it. On the left side, I have spaced out the turquoise with more of the shiny metallic beads, which might be what you were thinking of. I would like to use at least some of the beads at the connection of the yoke to the pendant, so it can appear that the yoke just wraps around the pendant... That was my design idea here. But it could be just a few beads, enough to establish the idea, and then we could switch to vintag brass chain if you prefer.
Here's another not very good photo. What do you think?
Marsha
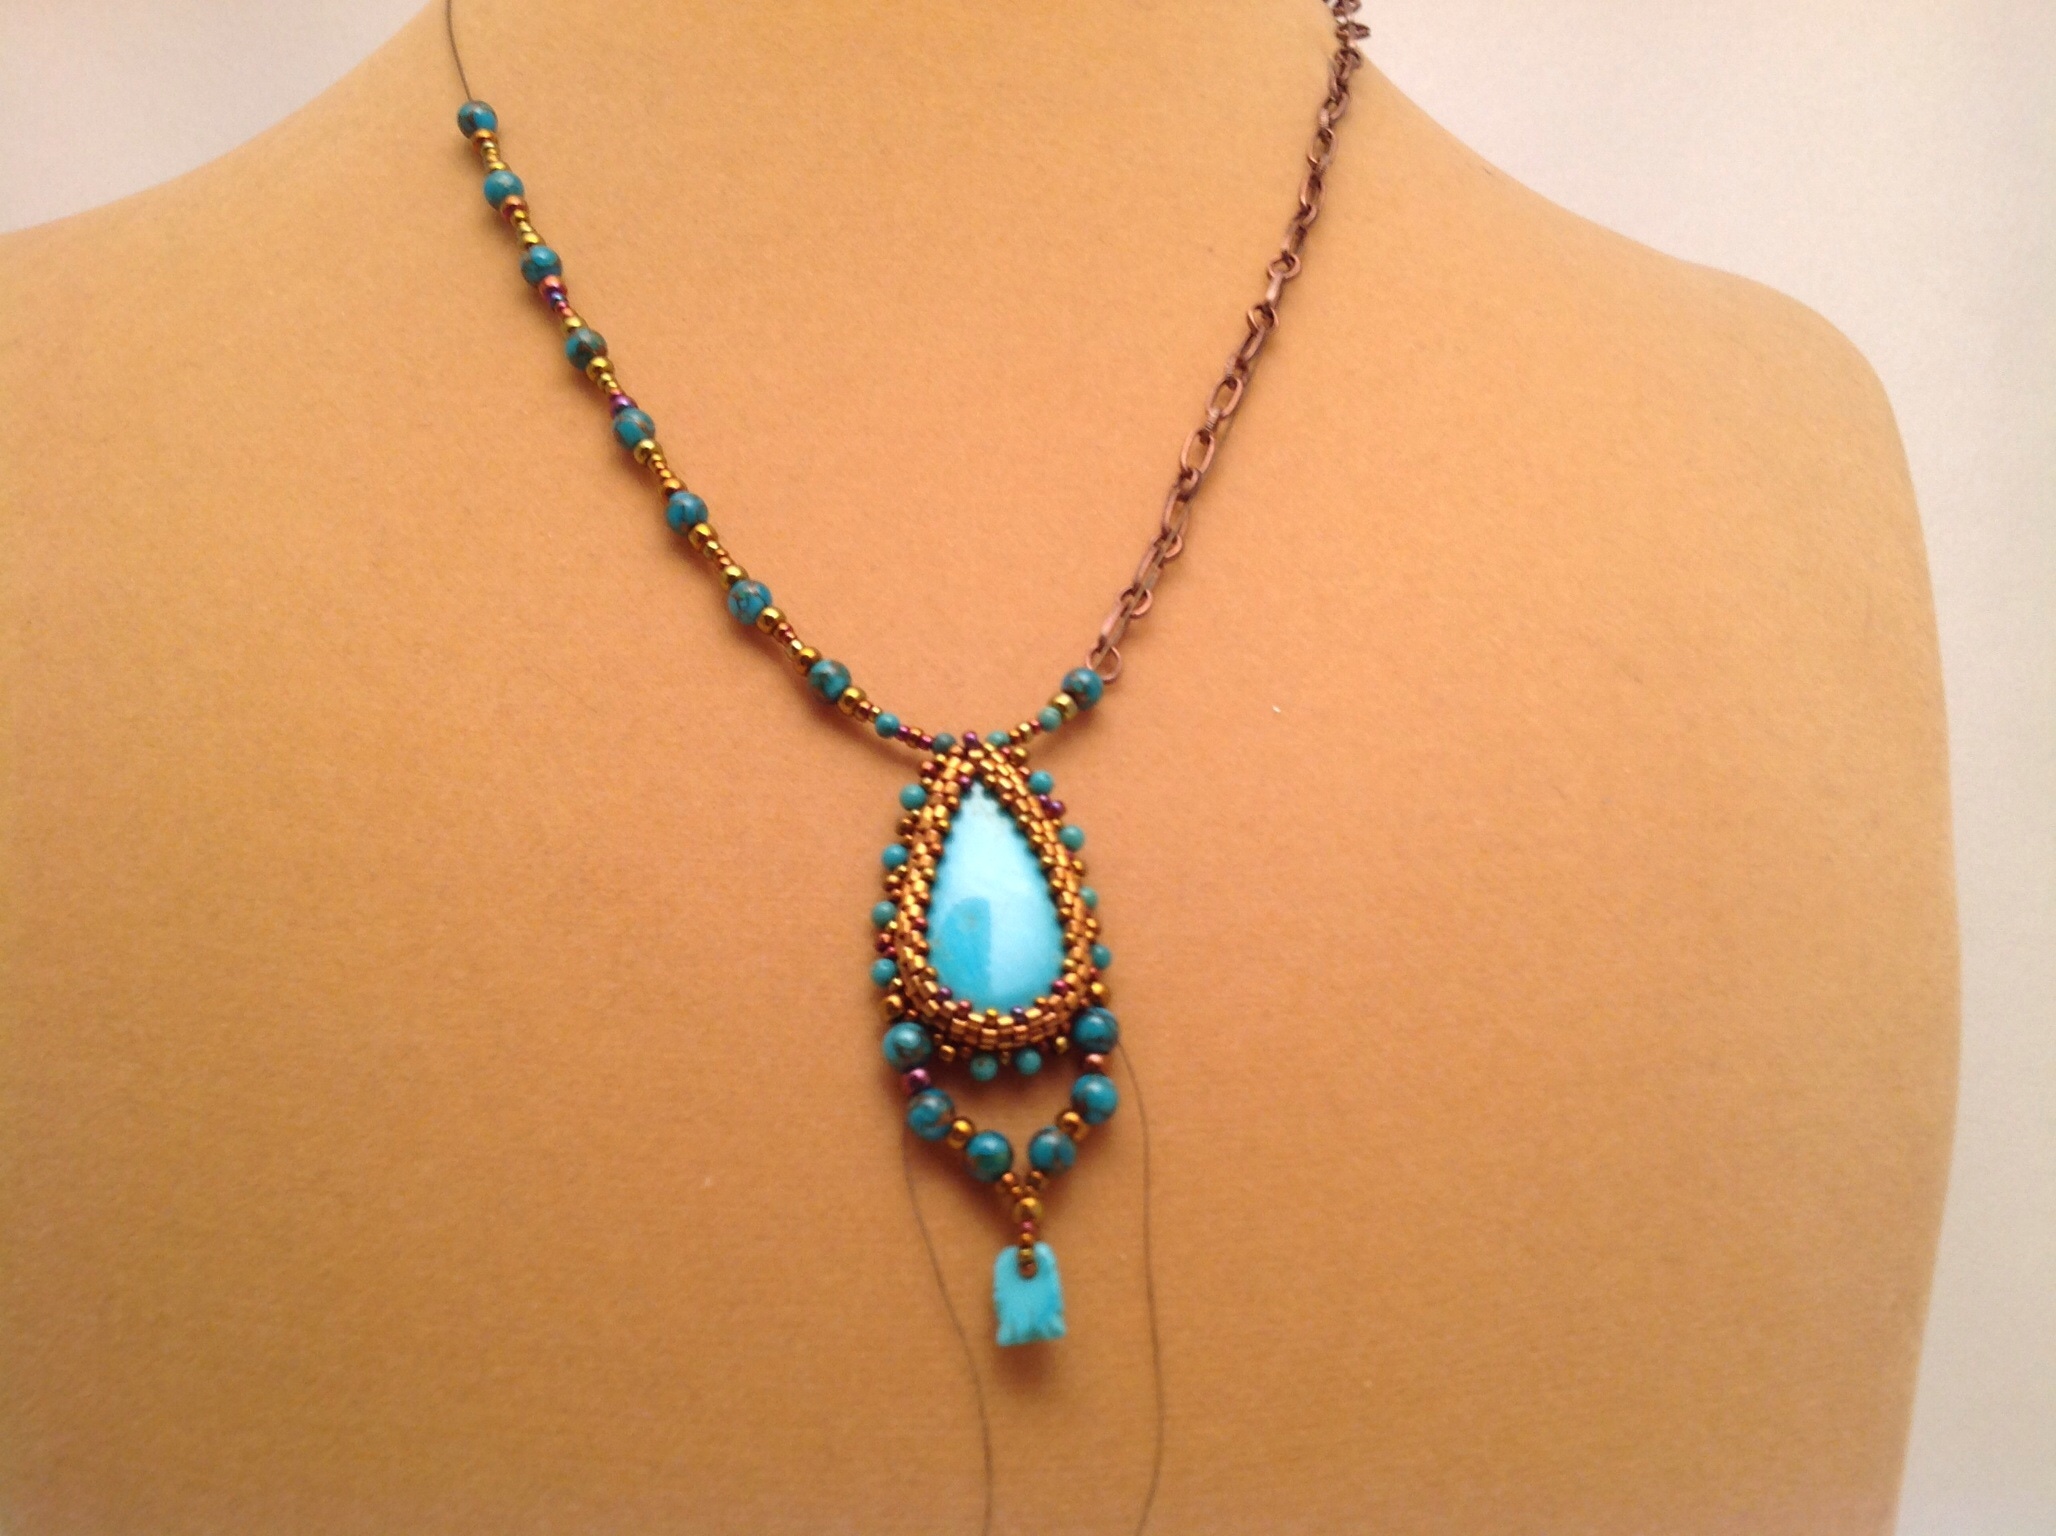
Above, The two new possibilities...

One of the stone bead yokes I thought was a good example of relaxed but elegant.

And the other, a yet more casual piece, without the crystal of the first.
yes, the second version with the beads is what i was thinking. after looking at both versions, i do prefer the original one. the second one loses something, or looks detached in some way. almost like they are 2 different necklaces.
so, i should have listened to your trained eye, because you are obviously very good at what you do. thank you for showing me the difference. now i won't be forever wondering.
i do love your original version. if you can finish it like you were thinking, that would be great. i love it!
thanks!
jennifer
(So finally, I took the information my client provided and my own opinions and aesthetic, and created a yoke that clearly delineated the idea of the strap wrapped around the bezel, using both the Kingman bronze infused 4mm beads and some slightly smaller solid deep cyan turquoise. It was my best effort to meet all requirements and be pleased with the results myself as well.)

I like the sleek silhouette of the focal surround, and I am pleased with the beaded yoke as well, given the gradation I established and the alternating larger and smaller but deep turquoise color, which lets the chip and the cab be the stars of the show. Everything else quietly assumes a colorful but subdued supporting role.


I like the sleek silhouette of the focal surround, and I am pleased with the beaded yoke as well, given the gradation I established and the alternating larger and smaller but deep turquoise color, which lets the chip and the cab be the stars of the show. Everything else quietly assumes a colorful but subdued supporting role.

Jennifer, you have been so kind and trusting. Thank you. I am finished and will post the final results in my shop shortly, reserved for you, You can purchase it when you are ready and I will get it in the mail to you. I am working on a blog post and will send you a link when I am finished with it. If you find there is anything you are not happy with, please just let me know and I can adjust it for you. I am pleased, and hope you will be too. Since all the beads and tools were out, I made you a very simple pair of earrings I think will compliment the necklace as a gift for you. If I can ever be of service again, please let me know. It was a pleasure working for you!
Warmly, Marsha

Do you have strategies for successful custom work? Special ways you like to work? Please share!


