Search This Blog

Showing posts with label Pineapple Blossom Necklace. Show all posts

Friday, October 28, 2022

Visit Blue Hawaii on a Dreamscape Dragon!


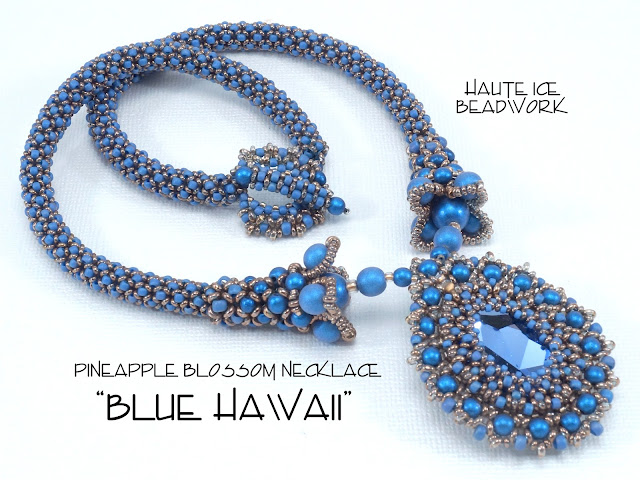
 After a long, lush summer in the garden, and a fall about a remodel (still not fully done), I am back to beading. I am starting with re-kitting projects that have been out of stock for a while. Like Blue Hawaii Pineapple Blossom Necklace.  It's an exploration of Chenille bezeling, and how Chenille expands to make a bell connection. Plus great with faded blue denim, and all soft blues.  Find the kits here in my Etsy shop.

I got a few Dreamscape Dragon kits finished last week and they sold out in a hurry, so more are now back in my Etsy Shop here.  They are vibrant, with great harvest colors.  I love my dragon on matte black, so it really shines!  I managed to locate some of these jewels, and I hope my source will provide a solution to the missing jewel for the Paradise Dragon as well.  I have samples ordered, and will keep you posted! 

I was honored to be featured on the wonderfully curated "Seed Beads and More" Facebook page last Saturday.  I showed a lot of my competition work, which is how my beadwork design developed and matured.  If you'd like to take a look, here's a link to that post.

In the meantime, I'll be wearing my Dreamscape Dragon for Halloween festivities. Seems reasonably magical and spooky.  Happy costume holiday to you all.  ENJOY!

Next up, some Honey and Berries Caramel's Claws.  They always remind me of pumpkin pie!


Friday, May 27, 2022

More Peppermint and Spearmint Kits


I have a dozen kits to list tomorrow, Saturday May 28th, at 10 am CDT in my Etsy shop.  Eight are the bluer Peppermint, and four are the greener Spearmint.  I do have two previous requests to fill first, so there may only be 10, and only time will tell.

No sales to offer this time, and sadly, I will need to do a small price increase on all kits in the near future to reflect the cost increases in both materials, and Etsy fees. But for now the prices are the same as before.  Grab them now if you want them!

My garden really needs me, so I will pause a bit to catch up outside and then will have MAYBE a new 4th of July project I have been working on.  It just depends on how many weeds, and how many seeds...

Isn't it interesting that both my beloved pastimes require seeds???  

Enjoy the LONG WEEKEND, or in my case, WEEDEND!


Thursday, April 21, 2022

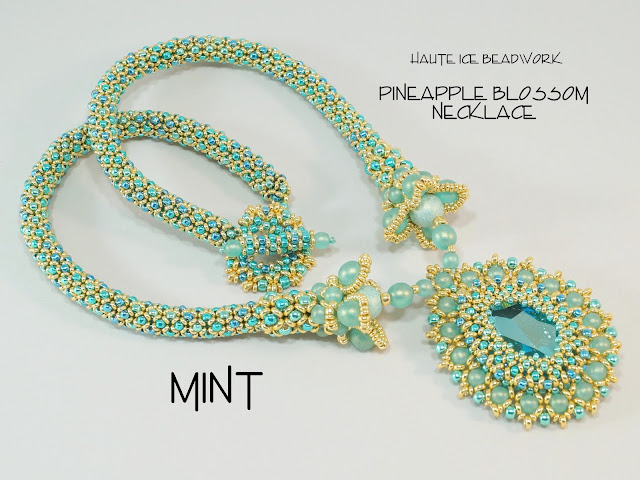
Meet Mint!

 In my quest for replacement parts for Pineapple Blossom Necklace Kits, I stumbled across a source for some "S" Fancy Stones in colors I had not used before.  So, presented with an opportunity, I ordered some samples and jumped right in!  I hope you'll like the results!  Meet Mint!


I have to admit, I started here because I found a new sweater at the Soft Surroundings sale rack, in one of my favorite colors.  The color I thought (as a very young teen) all my bridesmaids would wear at some big church wedding.  SO I did tilt this piece toward cool summer icy blue greens, and that sweater.  Plus a closet full of other things I love. That is the new sweater, top and center.


My first efforts with Pineapple Blossom mostly were about the interplay between shiny metallic dark Toho Demi beads and their soft Semi-Glazed bead colors, plus the Sueded Gold and other matte Czech rounds.  I gradually used lighter metallics with the mattes, and this time, I have all-out, unabashed dazzle.  I loved the many colors in the Swarovski jewel, and teamed it with Toho Perma-finish metallics.


I used the beads in a gradation in the bezel itself, and mixed them together to use randomly in the rope.  I think my gradation is so subtle it's almost irrelevant, but I enjoyed doing it, so in the kit, the colors are separate.  YOU can decide when to mix them, or not.  

I ran short of the Czech beads for the last of my kits, so created a kit without a sample piece.  It will use Baby Blue Czech Pearls, instead of the Sueded Gold Light Teal in this version.  There is just the one.  And you have to gamble.  But I think it will be luscious.  If no one wants it, I get it for myself, lol! 

Here's a little idea of how it might look...


I think the pearl finish works really nicely with the metallics!  And blends nicely with the color mix.

So, the new kits will be live in my Etsy shop at noon this Sunday, April 24th.  There are 6 of the Mint, plus the one Baby Blue and I will put them all in one Mint listing, with the Baby Blue as a color choice.  

It's been quite a chilly spring in Minnesota, but there have been a couple "sweater only" days.  Guess which one I wore???  

Hoping your Spring has rainbows, and robin eggs, and a little sprouting fresh mint.  


Saturday, October 24, 2020

That Sweater Needed a Necklace

 It came from Target.  It's a color that is in the Pantone array for Fall and Winter this year. I had the Orchid Mist Pineapple Blossom necklace that worked with it.  But I had made that necklace shorter to wear on my skin with an orchid summer top, and it felt not long enough.  

Here's the original (but short) Orchid Mist.

So I made a new, longer one, with a silver demi bead.


I really like the result.  It has a dressier look than my original, because of the silver framing and the richer finish (Pink Metallic Suede) of the Czech round accent beads.  I designed the original colorway to work with a range from Orchid through Purple, but somehow, this lively Magenta wanted a different feel.  I'll show you the two together so you can compare and contrast.


This necklace sold out in all of its colorways last month after a kind gentleman posted his finished work in Seed Beads and More on Facebook.  Then another client posted her beautifully finished work and I have been scrambling to get some kits in stock! 


I now have all the colors available except Orchid Mist, and I am just waiting on the focal jewels to assemble those kits.  


Please visit my Etsy shop for the Pineapple Blossom Tutorial and the many kits available. 

Stay safe in this crazy weird year of chaos and surprises!  


Wednesday, May 17, 2017

How to Put a Leather Backing on a Swarovski Jewel

Many of my tutorials call for the application of leather to the back of a Swarovski "Fancy Stone".

These stones have pointy backs with an anodized coating that reflects light back out of the glass to yummy effect.  I cover the backs with leather for several reasons.

First, the backs can be nicked or chipped if dropped, or sometimes just through repeated use, the backing shows wear.  Vintage stones are especially susceptible to damage, and the most recent ones are the sturdiest. So one purpose of my leather backing is protection.

The second purpose is aesthetic.  I think the exposed silver backing does not merge nicely with the beadwork that is not silver itself.  I use lots of color in my designs, so I want to have a matching backside for the work, like this one below.


I also think sometimes necklaces can be made reversible, affording a more casual result and turning a very sparkly stone into just a beautiful shape to work around, like in my Pineapple Blossom necklace.

Finally, I think there is a comfort factor.  I like the feel of the soft leather against my skin, more than the cold, pointy anodized backing.

Lots of things are hard to learn from just hearing how they are done, but much easier to understand when seen.  Honestly, I could not imagine how Peyote stitch was done, despite looking at a diagram, until I took my first beading class.

SO, here, to add to the text and photo instruction I have provided in my tutorials, is a little video for you.  It's my first try, and my cameraman husband did not know I was planning to get the job done in one go, so he speaks up, which is added entertainment for you.  I know, I know, I really must learn to edit and create lovely films, but I think the need here is immediate, so without further ado...


The jewel used in the demo is Iridescent Green, which means it has a factory coating on its surface. As you saw I was able to rub off a glue mistake with my thumb at the edge, and you will be able to do that on the surface as well, even with color coated finishes like AB, but this is safest with modern stones,  Be very gentle with vintage finishes. Be sure to let the adhesive dry before you try to rub it off.

My rice bed is immense because I do a dozen jewels at a time.  Yours can be much smaller. Something with a lid is a good idea, to avoid spills.  I use an ancient margarine container, when I am gluing just one stone at a time.  :)


My press cloth is light grey polyester organza.  Protects my iron and the leather, keeps them from sticking to each other, and easy to see through to what you are doing.  Any pastel or white works, but the grey is the most invisible.

I mention Poly Pellets, which are essentially Beanie Baby guts.  I buy mine at the local craft store, but you can find them here, at Joann Fabrics.  Rice beds are traditional in complex gluing projects.  I learned the trick from my model-making son.

And these are the trimming scissors I adore from Gingher.

The pen is a roller ball, which works really well on leather and suede.

The adhesive I use here is E-6000, and a pointy applicator tip is not your friend for this project. A tube with a flat opening allows you to wipe on the adhesive thinly and evenly and the little ones are easiest to manipulate. Please be careful with this glue.  The fumes (as the adhesive cures) are carcinogenic, which is why I recommend that you cure it for at least 6 hours, (and 24 is better) in a closed bathroom with the exhaust fan turned on.  I just read about a new, reduced smell, non-carcinogenic adhesive from the same manufacturer, and I will test it in the coming weeks and report back here on it's usefulness for this purpose. NOTE!  I have done all my more recent backing with Gem Tac from Beacon.  It avoids the chemical connection entirely as it is a water-based adhesive.  It has been working great for me, and no clients have complained. 

Please forgive the primitive nature of this video.  I think, you have to start where you are, and I have already learned a great deal in creating this very simple little bit of film.  Hang in there with me, and my efforts will improve with time.

Now go make yourself some pretty, leather backed Swarovski Fancy Stones!

Monday, May 8, 2017

Pineapple Blossom Necklace


This project is a combination of two stitches (Peyote and Chenille), and two different bead finishes (shiny dark rainbow, and matte pastel rainbow). The 29 page Intermediate-Advanced level tutorial is available here in my Etsy shop.

Sadly there are way more than two different beads in the project, but whenever gradation figures into a design, it's a safe bet that MANY different sizes of any bead used will be necessary.

I appreciate that buying $3 worth of beads to get three of them does not always fit into everyone's budget.  I have had a great time playing with colors, and have three colorways available as kits in my Etsy shop.  The kits actually cost less than buying all the beads you need separately, and save you time.  But if you want to create your own version in your favorite colors, there is a handy chart on pages 3 and 4, that show your which beads need to be dark and which light, and what needs to contrast with what.  I struggled with that myself, and wanted to make it EASY for you to do!


First, there is a warm, soft golden green, which reminds me of new leaves, paired with a metallic olivine rainbow effect. I love the flashes of purple in that dark bead!  I called it FROND, and that kit is available here.  I think you can see in this photo the texture of the bezel, which very much reminds me of a ripe pineapple, hence the name.

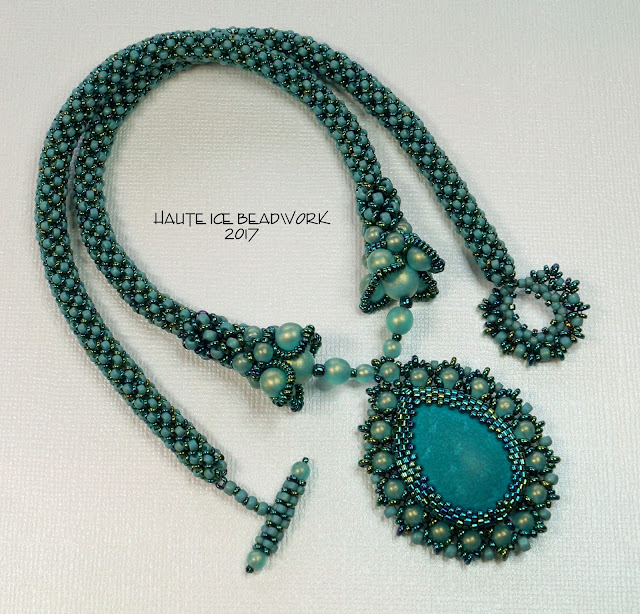
Since the pineapple name evokes Hawaii for me, I thought there should also be a SURF color, which is soft matte pale turquoise, accented with deep teal metallic rainbow finish.


This image shows the back, and another important part of this project.  Before it is bezeled, the 20x30 Swarovski jewel is backed with soft leather, in this particular case Tandy "Super Softy Pigsuede" but Lambskin works really well too.  A soft, flexible piece serves well, and the process is described with photos in the tutorial.  I plan to try a making a video of that process over the next weekend, to help those of you who want to do it for yourselves.  If you don't, it's already been done for you on the jewels in the kits.  Surf is available here, although currently sold out.  But I will be re-stocking ASAP!


One more thing about the SURF kit.  The 15/0 beads at the center edge of the bezel are a tight fit, and one of mine (center bottom) sat a bit cooked.  I hate things like that.  BUT I think if I had not pointed it out to you, you would never have noticed.  SO, cull the tiniest of these beads and save them for the center of the bottom of the bezel.  It's interesting to me that each bead, even from the same manufacturer, has its own character.

Now, to the final colorway, the Orchid MIST kit, available here.  Had to have a flower for the Hawaiian theme, yes?  And orchid is a good description of the lighter color, with deep purple and navy metallic rainbow accents.


 I have to tell you, I have really struggled with photographing this color to get it to look like the real thing, and I think the above shot shows the color most accurately. There are two things I want to point out to you.

First, the bezel edge bead is transparent.  I wish it had a little more presence than it does when worn, especially against a darker color.  SO, I have given you a second, tiny bag of those edge beads (J), inside the bag containing the ones I used in my sample.  The beads in the little bag are opaque and have a bit of moderate shine. You can test for yourself and see which you prefer.  I also put in some of the same beads in the smaller size in the H bag, for the center of the bezel if you prefer them.  Your choice: neither is a mistake, just a slightly different result.


The second thing I want to discuss with you is the N bead in this first Orchid colorway, that peeks out of the bell-shaped cones at the bottom of the ropes.  I did not find what I thought was the PERFECT bead for that spot, until my second set of kits.  So first generation Orchid kit buyers have three choices.  Two sets of them have a gold finish on them, and if you look at the first photo, you can see I used the lighter one in the sample I made.  It's OK, but a little golden, for the rest of the beads.  I think the other gold finished bead looks a little taupe-y, and not my favorite. Marie, who tested this project for me, used the purple bead, and I think it blends in better with the rest of the colors.  BUT you get to make your own choice.  Remember that it sits almost entirely hidden in wearing, and is seen only in shadow.  Make the choice your prefer.  None of them is a bad choice.  Please yourself!

I had a wonderful release of this tutorial and set of kits, (the photo below is the result of the first 12 hours, and barely fit into my very large mailbox) and I want to thank you all again, for your appreciation of my pattern, and your purchases.  If there are ever questions you have about a process or step, please contact me, and I will do my very best to help you.


 May your mat be full of beauty, and your heart full of joy!