Since my background is costume design, I often think about how the jewelry I design will be worn. Sometimes, when I afford myself the luxury of working with something special from my stash, I design in a way specific to the clothing to be worn with the piece. I just spent a week of evenings, making myself something to wear for Thanksgiving.
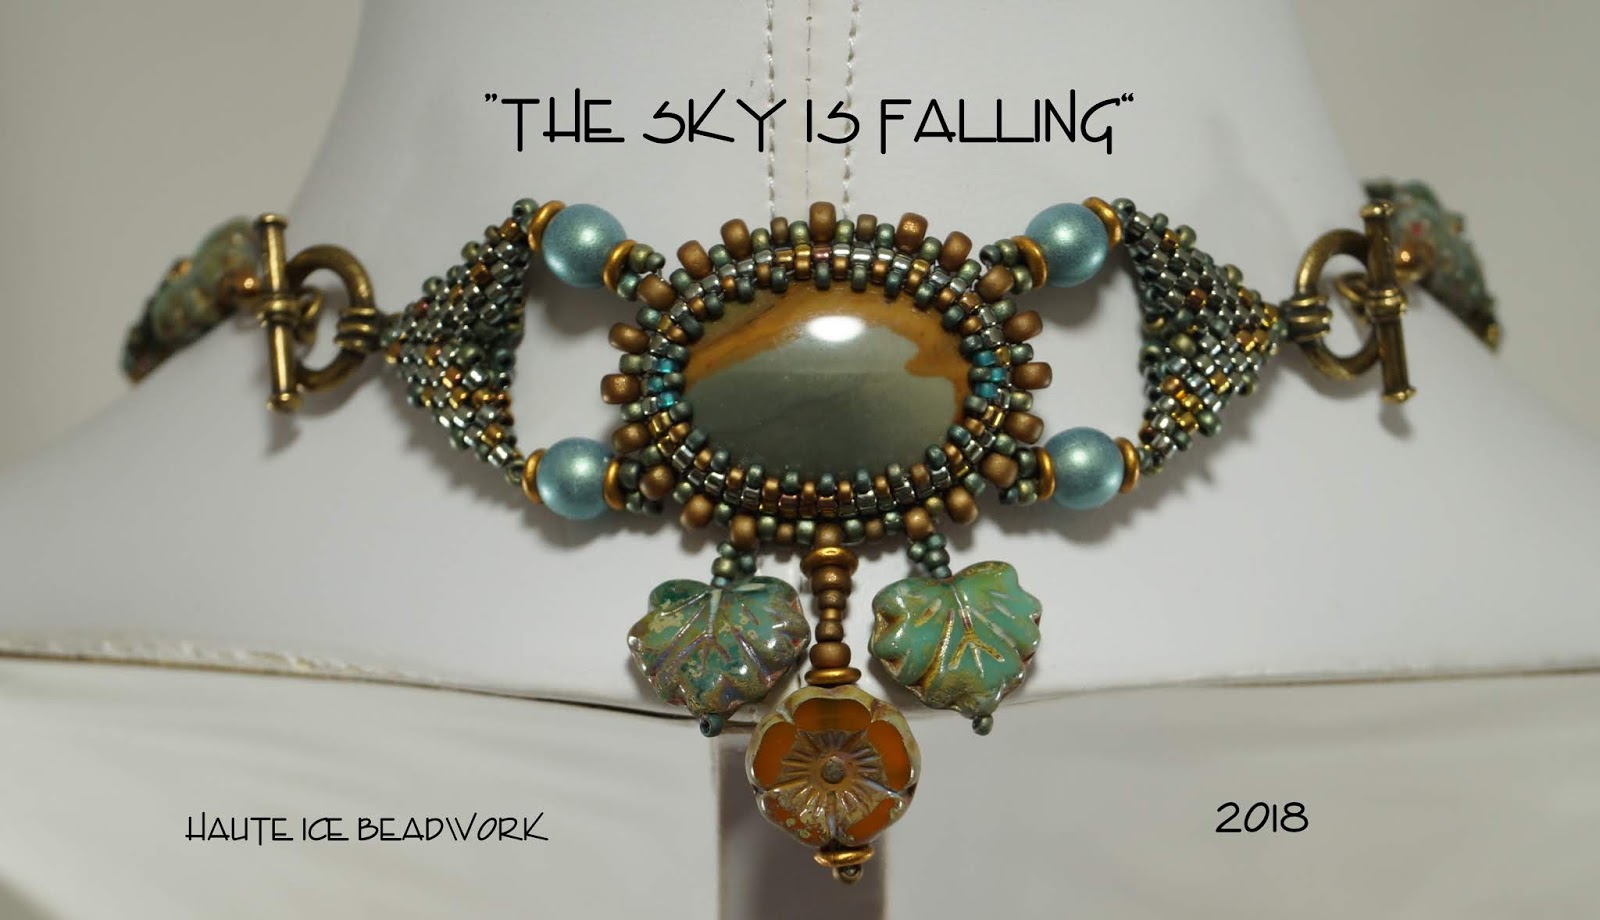
I had 4 pieces of Owyhee Jasper from my favorite lapidary; a gigantic square, and three oval cabochons. Owyhee is sometimes called Picture Jasper and often has landscape imagery. I thought mine had warped imagery. like something you might see through a fisheye lens. The phrase "The Sky is Falling" kept running through my mind as I bezeled it in one of my favorite Toho colors, #721, Oceanic Metallic. It has a cool blue silver, plus some earthy bronze and copper beads, and the mix seemed perfect for the stones. It was a monster bezel, with a base row of 124 beads, 31 Aikos on each side. Those of you familiar with my post on square bezels might appreciate that info! You might even check the math. As usual with bezels, I worked the back first and then set in the stone and wrapped the sides, with reasonable ease, given the size.

As I worked on the bezels, I decided a long gray sweater dress (a gift from The Best Man Ever last Christmas) would be the perfect thing on which to display the stones, and got out a dress form and the sweater to start working on layout. The sweater had some interrupted X cables, and I turned the large square sideways and added folded warped squares to each end to emulate the cable shapes.

I planned to create interruptions between X shapes in the jewelry, and hunted through my stash for some likely candidates for creating the breaks. I also liked the long vertical line of cables at the center front of the sweater, so decided the featured part of the necklace would be a long fall, that included the largest cabochon. I liked the gentle shock of the soft turquoise green Czech rounds to help with the break illusion, and placed the smallest oval at the bottom of the fall, also vertically arranged. I put the largest oval at the top of the fall, and arranged it horizontally.

I always think that the best necklaces are sympathetic in shape to the garments they are worn with, and given the oval soft curve of the neckline, I wanted to emulate that curve in the yoke. Using the largest oval as a junction between the long fall and the soft oval curve, I created what I think is the best part of the necklace, I love the negative space in the conglomeration of connections there, and I am pleased that the beautiful shape is revealed against my skin. I plan to work that idea further and use it for a Spring project tutorial. It seems very floral in character, like three petals to me.

I liked the square cab at the edge of the sweater, half on and half off my skin. I had only one medium sized oval left, and needed another couple to carry my idea of interrupted X shapes forward, so found two smaller oval Jasper beads and bezeled them. You see those at either side of the base of the neck. And since there was a landscape idea in the Owyhee, and the flowery central connection, I used some flower and leaf beads to create the interruptions in the yoke. I also added them as a triangular drop component at the bottom. I may remove this bit. It's not bad, but I am not in love with it either. I do like the proportion it gives to the length of the drop. I am super pleased with the sympathy between the shape of the neck edge and the necklace yoke.

I do like the drop component here at the back, but I might flip the bezel the other end up, so the landscape is supported by the orientation.

So lucky me, I've got new jewelry to wear for the holiday! And a good idea for a Spring project to boot!
When I was first making jewelry, and opened my Etsy shop, I spent some time trying to "make things I thought people would like to buy". I quickly found that a better strategy was to make something I wanted to wear. The sales followed. I find the same thing to be true with designing for tutorials. I find my best ideas in making things for myself, not in trying to create something I think someone else might like to make. So sometimes, playing with beads specifically for my own use, produces the best design ideas.
As soon as all the leftovers are put away, I will get back to work with my stick pearls, and still plan to release that new project for you in either late December or January.
I hope you have lots to be thankful for while you eat your turkey next week, and good friends to share with. Happy Thanksgiving to you!
Oh! Did you notice my photos look different? I have a new set of little studio lights and am learning to use them. They are brighter and cooler than what I am used to, and I know my white balance is not what I want it to be yet. I have a warm bias that is not quite satisfied. Plus, I still have some shadows to soften, but I like the new setup.


As I worked on the bezels, I decided a long gray sweater dress (a gift from The Best Man Ever last Christmas) would be the perfect thing on which to display the stones, and got out a dress form and the sweater to start working on layout. The sweater had some interrupted X cables, and I turned the large square sideways and added folded warped squares to each end to emulate the cable shapes.

I planned to create interruptions between X shapes in the jewelry, and hunted through my stash for some likely candidates for creating the breaks. I also liked the long vertical line of cables at the center front of the sweater, so decided the featured part of the necklace would be a long fall, that included the largest cabochon. I liked the gentle shock of the soft turquoise green Czech rounds to help with the break illusion, and placed the smallest oval at the bottom of the fall, also vertically arranged. I put the largest oval at the top of the fall, and arranged it horizontally.

I always think that the best necklaces are sympathetic in shape to the garments they are worn with, and given the oval soft curve of the neckline, I wanted to emulate that curve in the yoke. Using the largest oval as a junction between the long fall and the soft oval curve, I created what I think is the best part of the necklace, I love the negative space in the conglomeration of connections there, and I am pleased that the beautiful shape is revealed against my skin. I plan to work that idea further and use it for a Spring project tutorial. It seems very floral in character, like three petals to me.

Finally, I used the last of the ovals as the center back element, with a dual clasp structure.

So lucky me, I've got new jewelry to wear for the holiday! And a good idea for a Spring project to boot!
When I was first making jewelry, and opened my Etsy shop, I spent some time trying to "make things I thought people would like to buy". I quickly found that a better strategy was to make something I wanted to wear. The sales followed. I find the same thing to be true with designing for tutorials. I find my best ideas in making things for myself, not in trying to create something I think someone else might like to make. So sometimes, playing with beads specifically for my own use, produces the best design ideas.
As soon as all the leftovers are put away, I will get back to work with my stick pearls, and still plan to release that new project for you in either late December or January.
I hope you have lots to be thankful for while you eat your turkey next week, and good friends to share with. Happy Thanksgiving to you!
Oh! Did you notice my photos look different? I have a new set of little studio lights and am learning to use them. They are brighter and cooler than what I am used to, and I know my white balance is not what I want it to be yet. I have a warm bias that is not quite satisfied. Plus, I still have some shadows to soften, but I like the new setup.

Your photos might not be exactly as you wish, but they do your wonderful necklace justice. I love to read your creations process, always. Thank you for telling more about it. I agree that the connection piece at the front has something floral to it and am looking forward to seeing what you will come up with next Spring!
ReplyDeleteCath I love checking out your blog, and I am honored that you read mine. I am looking forward to working with these components again! Thank you!
DeleteGreetings Marsha:
ReplyDeleteThis new work is wonderfully connected in color and shape. Super story and sharing! Happy Thanksgiving!
-Eva Maria
Eva Maria, thank you! You really are a beader for the ages. I so enjoy your own beautifully crafted and presented posts, and projects. Happy Holidays to you too! -Marsha
Delete