I got such a cool e-mail! I am going to share it, but remove the name to protect the innocent.
"Hi Marsha,
My name is X and I was reading your blog post about square beaded bezels. Your tutorial is the most thorough I have come across! I consider myself to be a fairly competent beader, but the beaded bezel technique including corners has completely eluded me! Before I attempt this for the seventh time, I have a question for you... I am trying this technique on a 27mm Swarovski Fancy Octagon. I assume this technique would be the same for rectangular shapes, but the bead count would be more on the longer sides. For the corners, once I have skipped a bead on the first round of creating the corner, would I skip it again on the next round of peyote stitch? Or do I just skip each corner once, then proceed as usual on the following rounds? I hope that I am trying to describe makes sense. :) I am currently building a bit of a bead embroidery collection and it simply would not be complete with out bezelled cabochons of varying shapes!
Thanks so much for your blog posts. Your beadwork is exquisite!
-X"
This felt like such a fun challenge to me that I raced out to my local bead shop yesterday and picked out one of the jewels. It's a Swarovski "Fancy Jewel" #4627, 27x18mm.
 I got it out this morning while water boiled for my coffee, and gave it a go. I did it initially in silver delicas, with silver 15/0 rounds as needed. I felt that the angles were too small to to skip a bead, which results in a 90 degree corner, so I just replaced the eight corners with 15/0 seeds, along the facets. I did do some decreases on the last row of the face. I thought it worked well, and after finishing the face, I realized it would be hard to see here in a picture, so I did it again in black and silver, to take pictures. Then I looked at my clock and realized it was 9:30 and I had not ever made that coffee! Time FLIES when you are having fun!
Here is the thinking I used. I am sure there are other ways to do this, but, you can follow along if you like!
I strung a few cylinder (using delicas in the first effort and Aikos in the second, both work fine) beads and took a look at how many each side of the jewel would require.
The two short sides, top and bottom - 8 beads each x 2 = 16 beads
The two long sides, 14 beads each x 2 = 28 beads
The four diagonal corners, 4 beads each x 4 = 16 beads
16+28+16=60 So...
Rows 1 and 2 - I strung 60 beads on about 2 yards of fireline, and stitched through the first bead again, in the same direction. I left about a 12 inch tail, which I used later.
 Row 3 - I worked one row in peyote stitch, holding the work FLAT on my hand,so the outside row was larger than the inside one, trying to create the basic shape of the jewel, without any structural stitching, just thinking and shaping.
 Then I stepped up into the inside of the oval shape.
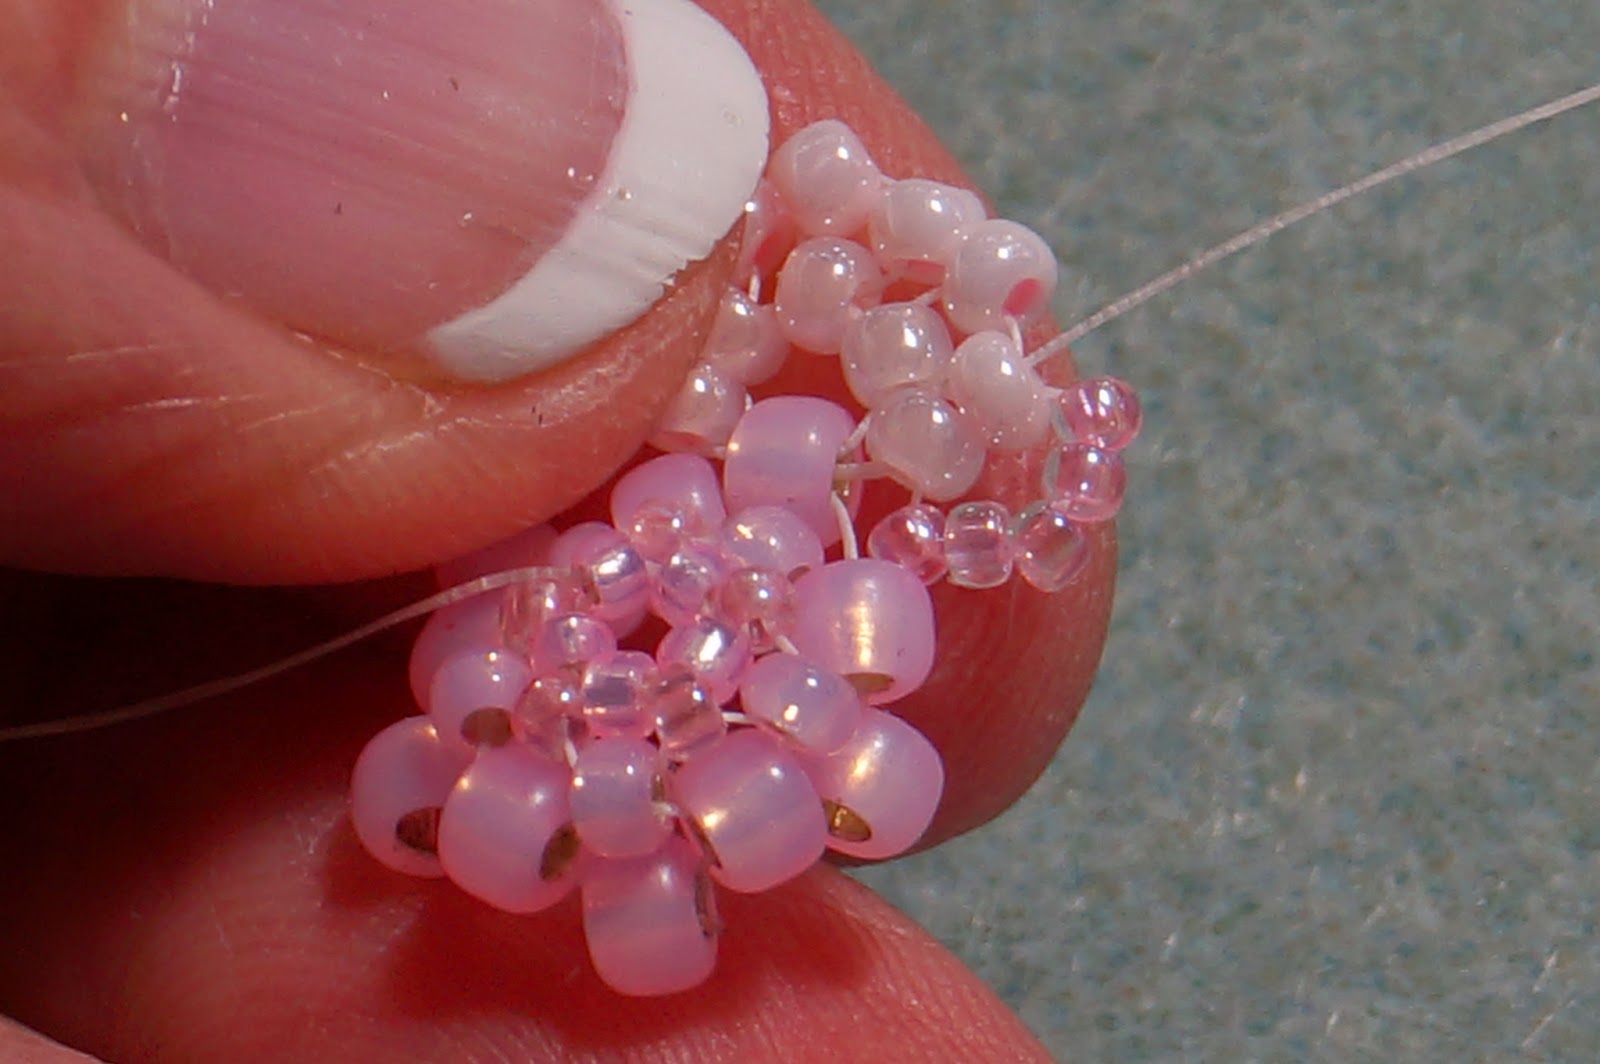
 Row 4 - Peyote stitch 6 11/0 cylinder beads , 1 15/0 seed. 1 cylinder, 1 15/0 seed, 3 cylinders, 1 15/0 seed, one cylinder, 1 15/0 seed, 6 cylinders, 1 15/0 seed, one cylinder, 1 15/0 seed, 3 cylinders, 1 15/0 seed, one cylinder, 1 15/0 seed, and step up into the next round. (That is the pattern, but I don't work it in that order. I started in the middle of a 6 cylinder side. When I do geometrically shaped bezels, I like to start in the middle of a long straight side, because starting at or near a corner is just too difficult and confusing. I think it is easier to understand the pattern if it is written this way though. so in the picture, I am in the middle of the long side when I step up.)

Row 5 - Peyote stitch 7 11/0 cylinder beads, 2 15/0 seeds, 4 cylinders, 2 seeds, 7 cylinders, 2 seeds, 4 cylinders, 2 seeds, and step up in to the new round.
 Row 6 - Switch to all 15/0 seeds and stitch 6, (I used black but they could have been silver) take one stitch without adding a bead, and add the one 15/0 seed corner bead, followed by a stitch with no bead. Then stitch 3 15/0 seeds, one stitch with no bead, 1 15/0 seed and one stitch with no bead. Repeat the 6 15/0 seeds, one skip, one seed, one skip and 3 15/0 seed, and the face is done and fits our shape nicely! Has kind of a cool deco shape too. Which I got all excited about and decided to finish a necklace with my little victory!

Row 7 - I stepped up through the bezel to the outside of the work, and switched to the tail thread. Then I loosely stitched a row of peyote with the cylinder beads. all the way around the bezel, holding the stone in place. I needed to leave a little space at the outside corners between beads. (It might have been possible to add a 15/0 seed at each corner, to be treated as a single bead in the next round, but I did not do that.)
 Row 8 - I stepped up again and stitched a second row in peyote, this one more snug, beginning to hold the shape in place. You must pay attention to having the stone positioned in the center as you work, and tighten carefully to keep things aligned properly.
 Rows 9 and 10 - Turn the original thread and stitch two rounds of 15/0 seed beads. SO here is a lesson. When a shape does not have 90 degree corners, you could probably get away with just making the essence of an oval bezel. like I did to finish the back. but I really like my shaped front.
Then I got all crazy and spent the rest of the day adding to the top and bottom of the bezel to create a Hexagon, adding a drop and bail and beading a rope. Because I liked it, and I had a free day!!!


"Hi Marsha,
My name is X and I was reading your blog post about square beaded bezels. Your tutorial is the most thorough I have come across! I consider myself to be a fairly competent beader, but the beaded bezel technique including corners has completely eluded me! Before I attempt this for the seventh time, I have a question for you... I am trying this technique on a 27mm Swarovski Fancy Octagon. I assume this technique would be the same for rectangular shapes, but the bead count would be more on the longer sides. For the corners, once I have skipped a bead on the first round of creating the corner, would I skip it again on the next round of peyote stitch? Or do I just skip each corner once, then proceed as usual on the following rounds? I hope that I am trying to describe makes sense. :) I am currently building a bit of a bead embroidery collection and it simply would not be complete with out bezelled cabochons of varying shapes!
Thanks so much for your blog posts. Your beadwork is exquisite!
-X"
This felt like such a fun challenge to me that I raced out to my local bead shop yesterday and picked out one of the jewels. It's a Swarovski "Fancy Jewel" #4627, 27x18mm.
Here is the thinking I used. I am sure there are other ways to do this, but, you can follow along if you like!
I strung a few cylinder (using delicas in the first effort and Aikos in the second, both work fine) beads and took a look at how many each side of the jewel would require.
The two short sides, top and bottom - 8 beads each x 2 = 16 beads
The two long sides, 14 beads each x 2 = 28 beads
The four diagonal corners, 4 beads each x 4 = 16 beads
16+28+16=60 So...
Rows 1 and 2 - I strung 60 beads on about 2 yards of fireline, and stitched through the first bead again, in the same direction. I left about a 12 inch tail, which I used later.
See the eight 15/0 beads, and how they begin to create the shape? My fingers and tension help this along.
Row 7 - I stepped up through the bezel to the outside of the work, and switched to the tail thread. Then I loosely stitched a row of peyote with the cylinder beads. all the way around the bezel, holding the stone in place. I needed to leave a little space at the outside corners between beads. (It might have been possible to add a 15/0 seed at each corner, to be treated as a single bead in the next round, but I did not do that.)
Then I got all crazy and spent the rest of the day adding to the top and bottom of the bezel to create a Hexagon, adding a drop and bail and beading a rope. Because I liked it, and I had a free day!!!
I continued with the Deco feeling of the bezel, and used up a cool little cone I got in my goodie bag from Swarovski at "Meet the Teachers" in Wisconsin at the Bead and Button show. There were loads of pretty awesome things in that bag, but this one I have been trying to use for months! For those of you who know me, I do not plan to sell this piece. I consider it an experiment. I want to see how the backside of the jewel wears, (since I did not completely cover it) and I want to see how permanent the "Permanent Finish" is on those silver beads.
I liked working fast and crazy for a day, and want to thank my reader that a fabulous time!!!